Monday, 30 April 2012

Project 24: Creating patterned papers

I saw an entry in Kirsty Allsopp's Craft book about stamping your own patterned paper. I got it out of the library as inspiration for crafts that are paper/card related without being actual cards. And I have so many stamps that I don't use as I always think they have to be the focal point rather than the background. Good challenge.


I started with a stamp I've had for ages but never use as it's complicated and elaborate and I never felt I had the right use for it. But I think it looks great as a background.


Then I tried a retro checker board using an olivey yellow and bright pink daisy print. I need to work on getting these closer together but I could do that. And I thnk the retro color combo is the way forward; I'm thinking lime and pale blue, brown and orange, dark green and and purpley pink...


I love an orange owl. It's sort of representative of everything I find joyous. Should you want to see something else I find joyous, try Charlie the Unicorn. I warn you, it's dark, but awesome. Back to the owls - I only tried a small section because I was testing a few ideas on this page to start off with. But I think I could try a long repeating stripe of owls and it would be sweet.
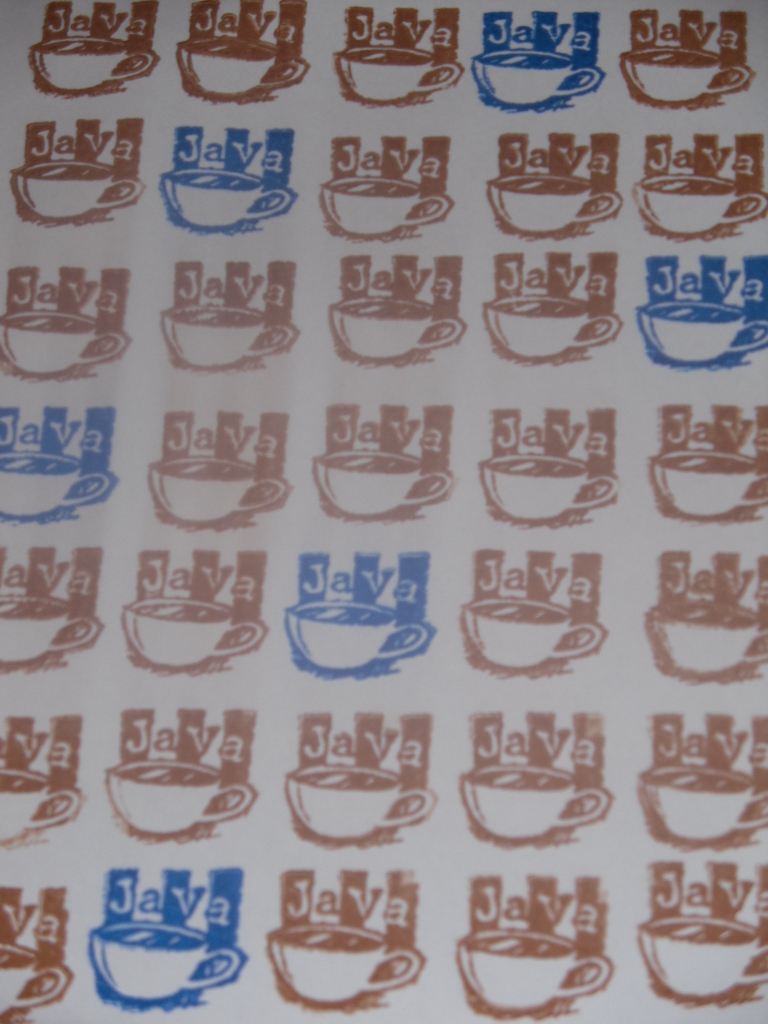

This java print is awesome and definitely the best one. I'm making more of these.


Finally a more traditional tile print. The dark blue I think would be really useful for card making (and in other colors as well) but it's really repetitive and boring so I don't think I'd do too many. The other one is a bit ornate but might work for a border?


So patterned papers are really easy to create. I think I'm going to do this next time I get a bit jaded with card making as it was really creative and definitely got the mojo working. Go mojo.


Sunday, 29 April 2012

Project 23: Pinata cookies


I saw this crazy cookie recipe on Pinterest and thought that’s just so involved and OTT that I’ll give it a try.

My excuse for making piƱata cookies? It’s sort of close to Cinco de Mayo (I mean, it’s a week away; in December we celebrate Christmas for the whole month so we can celebrate Mexican Independence Day a week in advance) and it’s my colleague’s birthday this week so cookies are definitely a good investment. And why make normal cookies when you can make incredibly complicated cookies and generate a blog post out of them?

So we start by making cookie dough and then dividing it into balls that are individually coloured. The far corner is purple but it looks black in this photo. 


Then you layer it in a tin so the dough will come out in stripes and leave it in the fridge overnight.

Once out of your tin, you cut it in slices and use your donkey (or burro if we’re going for authenticity) cookie cutter. This – and I need to address immediately – was actually something I had in my collection. I inherited the oddest assortment of cookie cutters from my Grandma Stevenson and therefore I own a donkey (or it could be a horse?) cookie cutter. I also own an axe, a windmill and a full suite of the four card suits in cookie cutter form but more on those later. 


And then you bake. According to the recipe blog I followed you’re supposed to glue them together with icing and mini M&Ms in the middle. But I didn’t do this because then I’d have to make twice as many to make enough for the office and the effort in getting the stripey dough was more than enough stress.  

A note to any potential followers who think, “this is awesome, I’m totally doing this”:  the dough wastage is really high and made me a bit emotional. Nobody wants to waste cookie dough! You can’t just re-roll the scraps that aren’t in the cutter though because then you lose the stripes. So therefore I used a tiny circle cutter to get some small cookies out of the stripes and then the scraps that couldn’t be used I’ve put in the freezer so I can use it for a cookie-crust of a pie or something. But if you hate waste then this is like your worst nightmare.

Oh! Forgot to mention that the original recipe tells you to cook the striped slices and then punch out the shapes – that’s even more wasteful than my tactic. Basically these look adorable but I’ve convinced myself by writing this blog this is not worth the effort. Just cook some normal chocolate chip cookies and everyone is a winner.

Monday, 23 April 2012

Project 20: Charity cards updates


Short post from me this week as an update to the Charity Cards post. I started my assembly line and made about 20 cards to give away. I’ve never made a set of cards with the same layout to give away before (other than the Christmas card situation) so I needed to do two designs in a few different colours in order to prevent boredom and abandon ship. 

I made 3 different colours of the embossed butterfly cards, mixing thank yous and birthdays, and then 3 different colours of a card featuring these girly stamps. I was on the fence on the stamps and think I might still need some coaxing before I go full monty with them.

But here they are, starting with the butterflies:


And then the stamps:


There are actually 5 different patterns of the stamps (all in this style with sweet messages) but this was my favourite and I’m fairly confident everyone loves cupcakes. If you don’t like cupcakes we can’t be friends.

Tuesday, 17 April 2012

Project 22: Time for Tea cards

We’re heading to Indy in a few weeks and I want to give my Grandma a set of cards.

In a "best of British" paper pack I got a few papers were dedicated to tea (as well as loads of really sweet designs with bunting and Warhol-esque Queen profiles – more on those in another post for sure) and so I’ve utilised those here as Grandma is one of the first tea champions I can remember. There were some greetings and phrases printed in the same patterns and colours and I usually disregard those as they’re normally pants but these were cute.

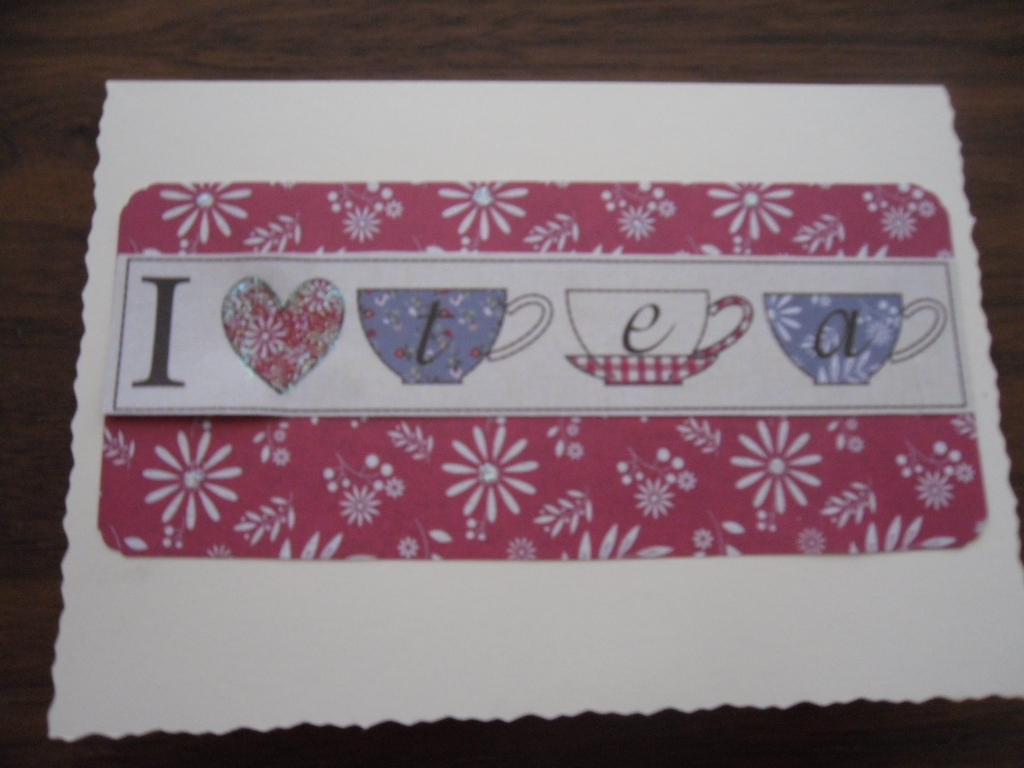
The headline picture was my fave – I liked the knot, the little greeting and the use of the pearl-bling on the hearts.

Here is a really simple one where all I did was layer a greeting over a pattern and then added some glitter glue to the flowers and heart to jazz it up.

Next, some paper flowers to add some 3D texture. The greeting was cut by hand – by the way – rather than using a die cutter as I don’t have one. Claire – if you read this – we are in a fight as you continue to introduce me to tools I don’t want or need until I see you have them and then I both want and need them.

Finally I used the biggest patterned paper with a lager greeting and some buttons. I’m loving buttons.

I got a bumper pack of stuff at Hobbycraft this week so I’m hoping to do some mid-week crafting to use some of my new kit…

Monday, 16 April 2012

Project 21: Blog Challenges

I saw this challenge on Mojo Monday and the layout spoke to me. I tried 4 different versions, really taking care with papers and embellishments to make each card work in its own right.

The headline card also works for another blog challenge site I stumbled across called the Shabby Tea Room which had a rose theme so I used the rose as the featured embellishment.

The purple butterfly is my favourite. I loved the papers and anything to use more Martha butterflies.

Next is my red white and blue feature using my British papers. I’ve got a big stash of paper flowers at the moment and I’m trying to replace my dependency on the butterflies.

Finally a Queen’s Jubilee card for my Grandma. It’s busy but I really wanted to use the textured papers and do something featuring those little illustrations. I added the glitter touches to make it a bit more "diamond-y" to reflect the message. It’s a bit twee for me but I think Grandma will like it.

More on Grandma’s cards later…

Saturday, 14 April 2012

Project 20: Cards for Charity

My mother-in-law is hosting a charity event celebrating craft and community. There will be enticing snacks, dance demonstrations and crafts for people to buy. Obviously, I’ve volunteered to make a few dozen cards for the occasion.

This weekend is manic so I don’t know if I’ll be able to get cracking on this like I want to. I have so many ideas for this and my Grandmother’s birthday (the Indy one) that I need to dedicate a few hours just to planning before I get started.

For Joy’s event, I’m going to shortlist 5 or 6 designs and then make them in as many colour varieties as I have available so I can keep myself focused. I’ll also be doing clear out of designs that I’ll call “experimental” for the sales bin.

I’ve been looking through my designs and think there are a few good options I want to shortlist. Let me know in email or facebook or leave a comment which ones you think should make the cut, keeping in mind it's the layout or idea that I'm going to reproduce rather than colour or papers (as these will change):


Embossed birds and flower

Embossed butterfly

Embossed birthday butterfly


Embossed birthday flower

Birds on line


Birthday owls

I want to do a few others with some "best of British" papers I got in a craft magazine (this is Claire's fault) and if anything stands out enough I'll shortlist that as well. Let me know what you think!

Monday, 9 April 2012

Project 19: Easter treats

Happy Easter everyone!

Easy little project this weekend that I found on Pinterest. I wanted to bring something for Easter that wasn’t just a chocolate bunny and this was a cute decoration for the table.

I cut out some yellow and light orange petals (turns out I don’t have very much yellow or orange stock but I had just enough for this project – excuse to spend money in Hobbycraft’s online sale?) and used a good old fashioned glue stick to fix them together. Next the orange cupcake holders (which I already had, obvi) filled with orange and yellow jellybeans.

I found a citrus mix of Jelly Bellies and I only had to eat out the green ones to get what I needed. Win and win.

Hope the Easter Bunny brought you some good treats this year!