Friday, 25 May 2012

Project 28: Birds for Mom


I know it's been ages since I've posted but I assure you it isn't because I'm not crafting away!

This post is coming from my parents' house as I did a massive production line of cards before I left for the States and then forgot* to blog about it.

Before I came home my mom said she was out of my cards so I decided to use this as an opportunity to play with the bird punch outs I created using Claire's punch. I did a few of the layout I posted previously for charity (birds on a line) but I wanted to try a few alternatives to see what else would work. Moms are great guinea pigs because even bad attempts are applauded.

The headline photo used the Jubilee papers I've referenced in the last few posts and is probably the most similar to the layout I've tried before.

Here are the other best outputs:

I rarely think in vertical cards, I always opt for landscape but I thought the border embossing folder would look good with these purple and green papers. I'm happy with this one, I think I'll try it with my other borders as well.


This one was probably my favourite use of papers as all three were from a set of scrapbooking papers I bought a year ago and haven't been using much recently. I like the wallpaper-looking paper in the background with the metallic-effect papers. 


This one uses papers I saved from a Victoria & Albert Museum guide - can't remember what the painting is but this is think it made some great bids. 


Finally some love birds. You can't see it very well in the photo but there is a lilac-coloured damask paper that the birds are sitting on and the ribbon has a nice sheen as well. Makes it seem a bit more grown-up as the floral blue papers here are a bit cutesy.

I have another post to go up from crafts I did on Sunday so hopefully I'll get that up before I come back from the States! 


*I didn't forget - I went out drinking with friends instead of blogging and then couldn't steal the time at work to draft the post. So here we are.

Monday, 14 May 2012

Project 27: Hypnotic toes

This post is about a project so simple, it took me less than 10 minutes.

I painted my toes today as I truly believe the London rain will eventually turn into a glorious summer. This could happen tomorrow or in 3 months time as we prepare for September. We all need to be honest about our expectations.

I painted a spiral on my big toes because I thought a flower was a bit twee and I don't think coloured or white tips looks that nice on my extraordinarily fat toes. I mean, look at them; they're huge.


Painting my toes is a HUGE deal as I had a ridiculously stupid accident in Paris last year that resulted in my big toenail completely coming off. I literally ran into my husband at speed wearing peeptoe shoes and the force caused it to come off. Dire and painful.

So after 8 and a half months I have something to paint! Bring on the sandals, come rain or shine!

I promise I'll do a real craft this week later to make up for the silliness of this one.

NB: My fingers are not the same shade of blue. Does this make me trampy? 
 

Saturday, 12 May 2012

Post 26: Femme Fatale cards (part deux)


This weekend I made more Femme Fatale cards using the papers that my sis gave me for my birthday. This isn't hte full set but some of the different combinations of patterns, embellishments and bling.


For these I tried a layout that I found on Pinterest. What attracted me to the layout originally was the use of gems and giant greeting and actually what I took away was the alternating middle panel. Go figure. I’ll have to try the other techniques in later cards but I thought the patterns were a bit too bold for the subtlety of the scattered gems.


One of the other new things I tried was using the black lace tape and then the white backing which had the same print. Quite like it paired with the actual tape!

Very short post but I’ve been busy producing cards for the charity event in June. Anyone reading this in the London area, the event is in Maidenhead on the 9th of June from 11-2, get in touch if you’d like to come along!  

Monday, 7 May 2012

Project 25: Jubilee blog challenge


Monday off means a day for Mojo! 


The sketch this week was busy, more going on than I usually go for but as I had the time off I thought I’d tackle it.


I used a set of Queen’s Jubilee papers that I mentioned the last time I did Mojo. I used one of the illustrations as the feature and then chose some of the more vintage papers to set the layout. I added the gold glue dots as a feature on the navy paper and then added in a strip of brown leather as the tie to give it that aged feel. And to give it some extra texture the cream card is crimped around the edges in a torn effect.

More cards came out of this session but I’ll save those for another post!

Monday, 30 April 2012

Project 24: Creating patterned papers

I saw an entry in Kirsty Allsopp's Craft book about stamping your own patterned paper. I got it out of the library as inspiration for crafts that are paper/card related without being actual cards. And I have so many stamps that I don't use as I always think they have to be the focal point rather than the background. Good challenge.


I started with a stamp I've had for ages but never use as it's complicated and elaborate and I never felt I had the right use for it. But I think it looks great as a background.


Then I tried a retro checker board using an olivey yellow and bright pink daisy print. I need to work on getting these closer together but I could do that. And I thnk the retro color combo is the way forward; I'm thinking lime and pale blue, brown and orange, dark green and and purpley pink...


I love an orange owl. It's sort of representative of everything I find joyous. Should you want to see something else I find joyous, try Charlie the Unicorn. I warn you, it's dark, but awesome. Back to the owls - I only tried a small section because I was testing a few ideas on this page to start off with. But I think I could try a long repeating stripe of owls and it would be sweet.


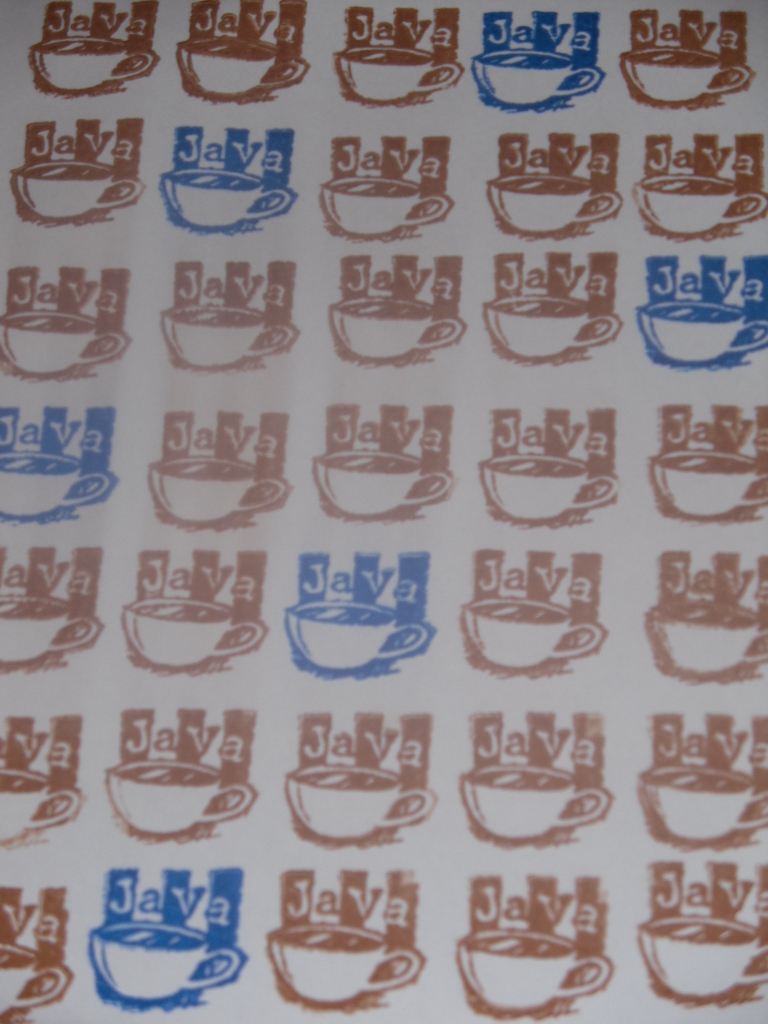
This java print is awesome and definitely the best one. I'm making more of these.


Finally a more traditional tile print. The dark blue I think would be really useful for card making (and in other colors as well) but it's really repetitive and boring so I don't think I'd do too many. The other one is a bit ornate but might work for a border?


So patterned papers are really easy to create. I think I'm going to do this next time I get a bit jaded with card making as it was really creative and definitely got the mojo working. Go mojo.


Sunday, 29 April 2012

Project 23: Pinata cookies


I saw this crazy cookie recipe on Pinterest and thought that’s just so involved and OTT that I’ll give it a try.

My excuse for making piñata cookies? It’s sort of close to Cinco de Mayo (I mean, it’s a week away; in December we celebrate Christmas for the whole month so we can celebrate Mexican Independence Day a week in advance) and it’s my colleague’s birthday this week so cookies are definitely a good investment. And why make normal cookies when you can make incredibly complicated cookies and generate a blog post out of them?

So we start by making cookie dough and then dividing it into balls that are individually coloured. The far corner is purple but it looks black in this photo. 


Then you layer it in a tin so the dough will come out in stripes and leave it in the fridge overnight.

Once out of your tin, you cut it in slices and use your donkey (or burro if we’re going for authenticity) cookie cutter. This – and I need to address immediately – was actually something I had in my collection. I inherited the oddest assortment of cookie cutters from my Grandma Stevenson and therefore I own a donkey (or it could be a horse?) cookie cutter. I also own an axe, a windmill and a full suite of the four card suits in cookie cutter form but more on those later. 


And then you bake. According to the recipe blog I followed you’re supposed to glue them together with icing and mini M&Ms in the middle. But I didn’t do this because then I’d have to make twice as many to make enough for the office and the effort in getting the stripey dough was more than enough stress.  

A note to any potential followers who think, “this is awesome, I’m totally doing this”:  the dough wastage is really high and made me a bit emotional. Nobody wants to waste cookie dough! You can’t just re-roll the scraps that aren’t in the cutter though because then you lose the stripes. So therefore I used a tiny circle cutter to get some small cookies out of the stripes and then the scraps that couldn’t be used I’ve put in the freezer so I can use it for a cookie-crust of a pie or something. But if you hate waste then this is like your worst nightmare.

Oh! Forgot to mention that the original recipe tells you to cook the striped slices and then punch out the shapes – that’s even more wasteful than my tactic. Basically these look adorable but I’ve convinced myself by writing this blog this is not worth the effort. Just cook some normal chocolate chip cookies and everyone is a winner.

Monday, 23 April 2012

Project 20: Charity cards updates


Short post from me this week as an update to the Charity Cards post. I started my assembly line and made about 20 cards to give away. I’ve never made a set of cards with the same layout to give away before (other than the Christmas card situation) so I needed to do two designs in a few different colours in order to prevent boredom and abandon ship. 

I made 3 different colours of the embossed butterfly cards, mixing thank yous and birthdays, and then 3 different colours of a card featuring these girly stamps. I was on the fence on the stamps and think I might still need some coaxing before I go full monty with them.

But here they are, starting with the butterflies:


And then the stamps:


There are actually 5 different patterns of the stamps (all in this style with sweet messages) but this was my favourite and I’m fairly confident everyone loves cupcakes. If you don’t like cupcakes we can’t be friends.