Tuesday, 2 October 2012

Project 46: Fabric wreaths


It seems like I haven’t posted in ages – please forgive as I’ve been in Wales for 10 days! This is the post week commencing the 23rd as this is when the crafting was done. I'll do another one for this week and then I won't be down on projects! 

We had some seriously cold and rainy autumn nights in our little cottage so I put that indoor-time to good use and made a project I’ve been wanting to try. I love wreaths at any time of the year but especially at Christmas. I found this example in a craft magazine and had to give it a go.

First a trip to the craft store to buy materials. I got 6 fat quarters of different red and green vintage-feeling fabrics and 4 1-meter cuts of fabric in plain green, plain red, polka dot green and polka dot red. 10 coat hangers and a pair of fabric scissors and away we went.

I didn’t take any process pictures because it was so simple. I cut a strip of the fabric that was about 4 inches wide and then cut these into 1 inch tall pieces. I then tied them to the hanger (which I had bent into a circle). Honestly bending the coat hanger was about the hardest part, you can see how easy it was to do this sitting in front of a fire watching movies!

And that’s it. I tried a whole bunch of different options, including my traditional color combos (red with a bit of green and green with a bit of tartan red) as the cover photo. I think they're my favorites.

My “Cath Kidston” (for the spots!) combo:
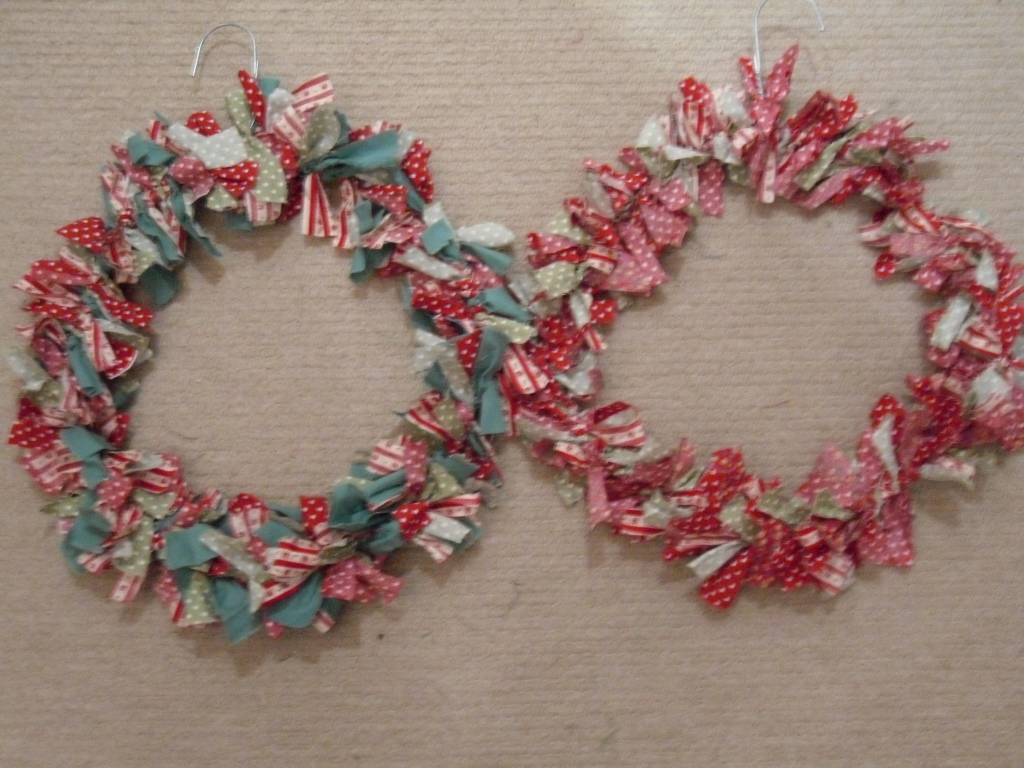

All green:


And all red: 
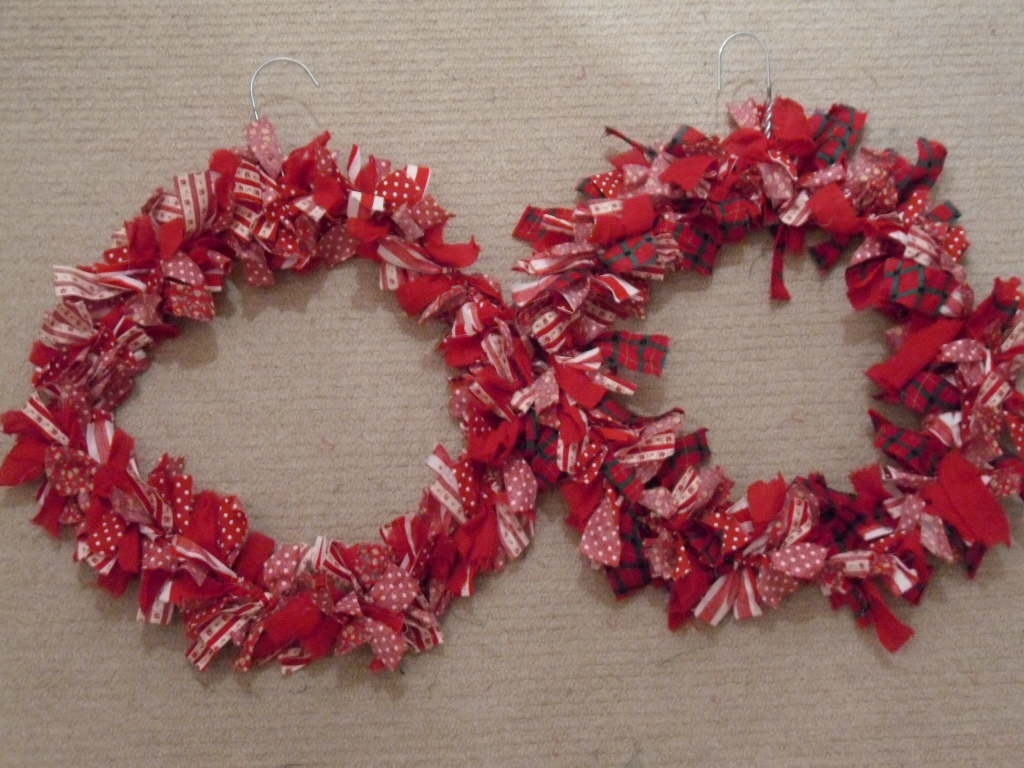

Each is ever so slightly different because obviously my inability to focus enough to do the same thing each night meant I varied the fabrics slightly each time.

My last step will be to cover the hangers, maybe by wrapping them in ribbon. The tutorial I followed had a little scrunchie thing that you made but it involved sewing and I don't think I want to make 10 of them. We'll see. I need to get some other crafting stuff done first before I finish it off. 

I’m going to sell these at the craft fair in October and again in December – hopefully they’ll be a hit as they’re so easy to produce!

How much would you spend for one of these? I’m thinking somewhere in the £8-12 range to cover my costs and labor time (even though it was easy it still took about 2 hours a wreath with all the prep). What do you think?   

Sunday, 16 September 2012

Project 45: Cupcake birthday cards


My mom got me this great cupcake punch and I thought I’d have a bit of a play with it. I tried a few different layouts but this is the one I liked the best. It roughly follows a Mojo sketch that I attempted a while ago. 

I punched a whole whack of the cupcakes to start in pink, green, blue and brown. I’ll add more colors as I think of more layouts but for now I was using colors that I thought would coordinate together and match my glitter background papers.

The headline one is really sweet and the blue and green makes it gender-neutral (I think). Is glitter paper gender neutral? Hmm. Maybe not. 


This one is my first version where I tried mixing the tops and bases.  I’m not sure I like it as the papers are a bit busy.


I think brown and pink is a good combo and both convincing cupcake colors. The pink glitter paper was too in-your-face-pink so I’ve gone for a nice white-grey.

I’ve also been doing loads of Christmas cards, I’m planning a Christmas update in the next few days so I’ll let you know what I come up with! 

Monday, 10 September 2012

Project 44: Card stock canvas decoration


I saw this canvas project on Pinterest a while back and have been looking for the time to dedicate to it. I have a few days off and thought this would be a good time to give it a try. 


First I went out and got a canvas. Wilkinsons sells printed canvases cheaper than you can buy a blank one in an art store so I bought one with a photo on it for £5 and painted over it. 

After getting the color I wanted (about 5 layers of mixed paint which, of course, were a slightly different shade each time because I never remembered the proportion of white to blue to green to black) I let that dry for about 3 hours. (I used a plastic bag over a gym mat as my crafting area after getting paint on the bathtub last time I tried to "safely" paint in the bathroom.) The paint looked streaky when I stopped but it dried really evenly.

I had cut out the petals the day before; be warned that this is tedious. About two thirds of it is the Latte Matstock by DCWV and the rest is comprised of scraps.  I did a loose arrangement to make sure it would all fit. 


Then I got to bust out my handy dandy glue gun. This wasn’t as time-consuming as I thought it would be. 

And there we have it (see headline photo). I’m going to hang this on the wall in the bedroom (even though it matches nothing) to jazz that room up a bit. 

PS I have some new Christmas designs as well so I just need to get another post up this week. Stay tuned!

Sunday, 2 September 2012

Project 43: Black and white dove cards


 This week I thought I’d make a set of cards for my friend. Her name in Spanish means “dove” and so I thought I’d play on that as the theme for the cards.
 
I chose a monochromatic color scheme as I thought this would lift the cards from simple birds to more fashionable cards.

The headline card is my favorite – I ran a vintage-style scallop border punch along the edge and then duplicated this in white to create a sort of lace effect. I got a new set of candies in black, grey and white with silver stripes and I think they add to the 30s feel of the punch. I liked the text print on the bird, this will definitely suit my friend’s taste. 


I have a corner punch that matches the border punch above so I used this on a white square to frame a different bird. I thought this one was simple enough with black candies.

Next I used the same grey striped paper as the bird punch with a scallop in white to highlight it. Different colored candies on the bottom. 


To complete the set: a little love-bird style design with some spotty ribbon.

I wanted to have a bit more of a challenge so I made her birthday card in a similar style, using paper cutting techniques I picked up on a course last year. It took me a long time as I’m out of practice but I thought the simple little design with a similar bird works well.

Saturday, 25 August 2012

Project 42: New tools and the start of Christmas


I’m going to give you two post in one as I haven’t had a chance to blog in 8 days! Work is insane and is really getting in the way of my crafting. Which is sad.

Firstly, last weekend I went to a craft fair with Claire. It was epic, largely because there are just so many crafters out there. We saw some cool new tools being used, got some sweet kit and talked each other out of some truly unnecessary purchases (while encouraging just a few unnecessary purchases because after all, we like a bit of fun). I'll have to tell you my opinions of some of the other things we saw privately as I don't want to publish anything unkind.

This is the haul I came home with:

 
We learned two really good techniques, one using inks/embossing and another using a punch/press combination. The punch we (yes we – too expensive for one of us to have so we have joint custody) bought is a flower punch that can be used on its own. But if you put it into the press you create a 3D flower that rivals most of the paper ones you can buy in shops. Pretty cool. 


It's hard to capture the texture but the flowers have little lines on them that are make them more realistic. I'll save the embossing technique for another post when I have a chance to practice it a bit more.

The second post shows a usage of it – I’ve started making Christmas cards already! I thought the green flowers would lend themselves well to a wreath: 

I’m not sure about the bow or bling, I need to play with that a bit more. 

I have a few new Christmas papers I’m trying out and I wanted to make some designs that were paper-led rather than stamps or stickers. Here are a few of the designs I put together, including a joy fold card that we tried a few weeks ago: 

What do you think- any of these take your fancy? They need a bit more work but I think they’d be pretty easy to reproduce. The squares are my favorite, you could put bling or any embellishments in there depending on the papers. The buttons, bow, snowflake and glitter (on the presents, hard to make out) go with these but I think anything could work. Will let you know how we get on and when the cards will go on sale!