Tuesday 31 July 2018

Project: Love bug dragonfly sketch card


The sketch this week at CAS(E) This Sketch caught my eye and I spent a ridiculous amount of time going through my craft stash finding the right combo of papers and objects for my layout. Honestly, sometimes the brain is just too full of ideas!


I wanted something that would be fun and modern, feminine but not too girly. I decided a dragonfly was the perfect object for the central feature and I die cut it using a great mustard color stock. It's actually two dies - sometimes I do contrasting colors but since I knew I'd be adding busy papers I went for both layers in the same color just for texture. The papers are from a little 4x4 paper set I was given and it's great because being the same set the turquoise colors are exactly the same.

The sentiment is from a little insect set I bought in a sale years and years ago - it's such a sweet little greeting that I thought it was perfect for the finished piece. Very happy with this layout, I may just use it as inspiration for a few more cards...


Monday 30 July 2018

Project: Giant ring sketch engagement card


A friend at work just got engaged and I absolutely love his fiancĂ©, she's a good laugh and someone I seek out at work events when people bring their partners. 


The sketch at Freshly Made Sketches looked like it would be fun to play along with so I did some sketching to see how I could make an engagement card work and it came together much easier than I thought! 

I started with a white piece of card and I die cut it into a rectangle with a spotted border die as I wanted it to match the spots on the sentiment. I then heat embossed the square stamp in a gold powder and then I really carefully blended the edges in Broken China distress ink. I just wanted a hint of blue as the white was really stark and I didn't love the contrast before I blended, it looked unfinished rather than CAS and the touch of blue evened that out. 

I die cut a piece of glitter stock paper into a ring using two circle dies and then used a big comedy heart gem stone from the pound shop.  All in all a really fun little card that stays playful and CAS. Job done :) 


Saturday 21 July 2018

Project: Panda on a bike for Sketch Saturday


Another happy Saturday to you all - and happy Sketch Saturday day! 

I have a panda-mad friend so whenever I see panda images I always make her fun little cards. Our sponsor this week is Kitty Bee Designs so this Trike Panda stamp was perfect for our sketch: 


I die cut the image in a circle and then colored the bike using ProMarkers. The papers are from a corresponding American Craft set and I've had these scraps for ages because I love them and always look for lovely cheerful images to use them - like this one! 

I used an ancient punched scallop heart to feature a stamp that was from a Recollections set. I decided to use little rhinestone hearts in the corner to complete the sketch. It's really colourful and bright and I think will make my friend's day. 

Hopefully you have fun with the challenge as well. 


Thursday 19 July 2018

Project: Wild animals for MAWTT


I love an animal card so the theme this week at MAWTT was right up my street. I decided to use an old favourite, the marching band animal set from Avery Elle. It's so cheerful it works for kids and adults alike and every time I make one it gets used straight away.

I started by stamping and die cutting each of the animals. I then dug in my paper stash for a suitably bright and cheerful background paper - I have a paper amnesty this year where I'm only buying plain stock, no patterns as I just have so many! I coloured the animals using ProMarkers and then layered them against the bright papers. I chose to keep them all in greens and browns - sometimes I go nuts and colour them whatever colour I feel like but this time I kept it simple. 

The little characters bring me so much joy - hopefully they inspire you to take part in this week's challenge! 

Saturday 7 July 2018

Project: A sparkly unicorn for Sketch Saturday


I love a unicorn so the Digi Stamp Boutique's collection of unicorn and fairy images was too much fun for inspiration for this week's Sketch Saturday:


I die cut the unicorn using a stitched square and colored it using ProMarkers, creating a rainbow in markers for the mane and tail. I used glitter paper to create a die cut sentiment from a Tim Holtz Christmas set and then using stitched circle dies to create a fun little rainbow and then cut it in half to match the sketch. I used a background paper from Hema, how lovely is that? It wasn't that strong against the white card though so I added a light purple border. 

I'm loving it. I hope you have fun with the sketch as well! 


Friday 6 July 2018

Project: Blended mini card set with modern sentiments


I love mini playdate challenges and Claire and I had too much fun talking this past weekend, it really inspired me to do some silly things. She was testing herself with one stamp set x4 cards so I decided to do the same. I started with an image set but actually landed on a sentiment set. These sentiments crack me up and I thought, why not make a mini card set and give them to a like-minded friend? 

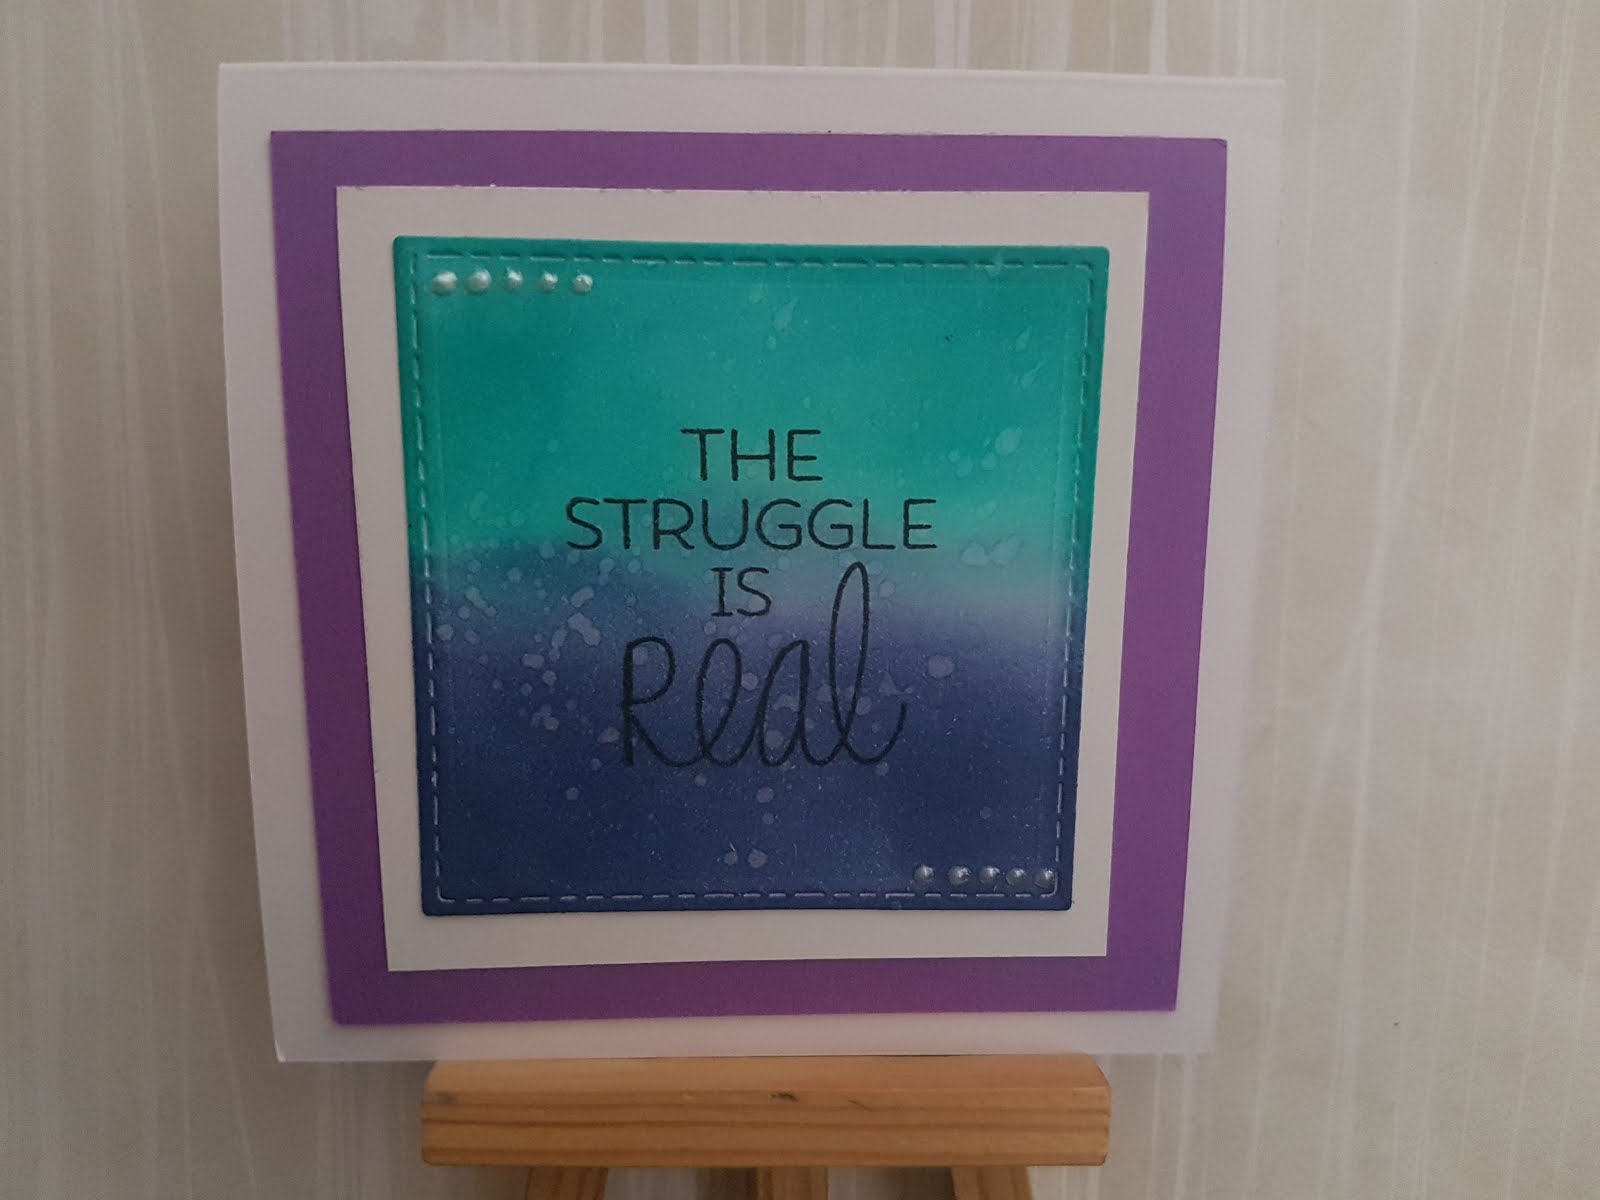
For each one I die cut a small square and then blended a two-tone color scheme, making sure colors overlapped from one to the next but never repeating the same combination. These then got stamped with the big hero sentiments and, just because they were feeling a little plain, I did a double mounting of white and then purple, pulling them all together but also giving them a bit more visually. 

I picked up my little bottle of liquid pearl dots and added some accents to the corners. I don't love it - truth be told - but I guess that's just experimentation. I like the vertical ones better than the horizontal ones so that's a learning. 

Finally I splattered some water on them to make them a bit more irregular. Love the set, definitely doing this again with a few minor adjustments. 

Thursday 5 July 2018

Project: Two takes on animal cards


This weekend I had a playdate with Claire and she talked me through using a new pull-off die she sent me and I decided it would be perfect to play with my fun little marching band animal set.

I started by die cutting the white strip on a scrap so I could see how it worked. I chose far too small a scrap so that limited my ability to choose the rest of the components! I know this for next time...I then stamped, colored and die-cut the animals. I stamped the first part of the sentiment on the tab of the pull-off and then on the backing piece added 'happy birthday' so there is a good reveal. I mean, it's an obvious one but I think the big adult kids in my life will love it.


This one has nothing to do with the first but as I was playing with Claire I decided to do some stencilling over a stamped image. See this post of her's for the inspiration she gave me! I stamped the hummingbird first and then stencilled over it using a mosaic Tim Holtz stencil with Distress Ink. I used his range of stickers as well as a bit of fun. Then I went old school and added twine and candies - it's like the cards I used to make in layout but with some more contemporary techniques. 

Playdates always encourage me to use the newer and more challenging tools! 

Monday 2 July 2018

Project: a Hamilton 30th and mega bling


So these cards are totally different but I made them at the same time and decided it would be fun to blog about them both at the same time.

The Hamilton card is for a colleague (and friend) turning 30 who - like me - is obsessed with the musical. We listen at work, discuss the characters, compare London and Broadway cast members...we're totally nuts for it. I decided too get out the scalpel and do a bit of paper cutting for the figure on top, then added the star die beneath. The background is blended using Distress Oxides as I wanted the same aged effect as the famous poster.


This congrats card is completely different! I used a great pattern paper and die cut a small square. I created a ring out of glitter stock using two different circle dies and added my mega bling on top. That is actually a rhinestone from a necklace that broke so it looks a bit rough in person but I liked the effect. The congrats sticker is from a big pack I got at Hema.

I had so much fun making them and as they're both for personal friends I'm sure they'll be thrilled with them as well.

Sunday 1 July 2018

Project: Triple lucky charm card


I loved the layout at CAS(E) This Sketch and thought it would be fun to play along. I rediscovered this adorable lucky charm stamp set in my stash, courtesy of Claire, and decided it was perfect for the layout: 


I stamped all of the images and then coloured them using ProMarkers. I was going to cut it really thin and add a border paper, then layer over the green but I really fell for the simplicity of the white card straight on green. Sometimes the simplest solution is the best.