Monday 27 February 2012

Project 10: Spring is nearly here cards

This weekend we had unseasonably warm weather so I decided I’d set myself a little spring-themed challenge using some lovely fabric flowers I got in my birthday bounty. I’ve been pinning a lot of embossed cards lately on Pinterest so I decided my secondary challenge was to use embossing folders directly on the cards, rather than on paper that gets added to the card. It was a “duh” moment; I can use the embossing folder on the card directly? Really? “It’s in the computer…?”

So here are a few of the outputs:

The first up are two birthday cards that feature some of the bigger flowers.

I like the double layer flower with the ribbon trim but the button version is my favourite. I popped in the button embossing folder as well to add some cutesy detail.

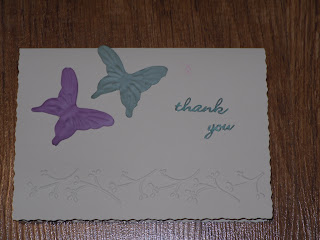
The second set of cards are both thank you cards, one featuring a full folder that is also new and I’ve been a bit intimidated to try as it’s got such a set layout. I like this treatment though the photo makes the greeting look more red than it is in real life. Must take better pictures...

I’m also weirdly into butterflies now. I say weirdly because they really aren’t my thing but I absolutely love using them on cards. Go figure.

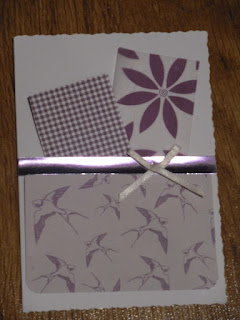
My last card here is my gem – so simple using the first embossing folder I ever bought, a pastel plaid flower and a button, highlighted with some tape. Love this, definitely making more of these.

Hope you weren’t disappointed by my inattentiveness last week – it was an emotional week at work and finishing the blanket was really my only craft priority. Thanks for your patience.

Saturday 25 February 2012

Project 1: Finally complete

It’s finally done: the baby blanket is complete!

It’s taken a few weeks longer than anticipated but that was always going to happen as I hadn’t ever worked on a project this big.

This is for my friend’s baby boy – now I just need to give it to them!

I am just off to the craft store to get some supplies for this week’s craft. I haven’t forgotten that I’m a project down this week. I’ll start something today so I can just squeeze it in and stick to my own rules of a new project every week.

Thursday 16 February 2012

Project 9: Femme Fatale Cards

For my birthday, my awesome sister gave me this kick-butt set of papers called the Femme Fatale series. They’re about as badass as crafting papers get: leopard print, zebra, gothic black kisses, all sorts of grey and shocking pink damask. There are some awesome color variants as well with orange snakeskin and green and black stripes but I stuck to monochrome with pink accents. It's a classic combo that I associate with my sis and I thought the first set should be in tribute to her.

I used very simple layouts because the paper are quite outrageous. I used some glittery cardboard strips that my craft buddy gave me on most of them, and then blinged them up where necessary. Here’s my mini-set of glam-goth cards:

I'm sort of obsessed with the snakeskin on the card above.

This paper has a slightly haunted distressed texture that I think looks a bit creepy/awesome.

Love the black lace - I just got these new thank you decals as well and I think they really work in black.

Thanks Sister! (yours is in the post, obvi)

Monday 13 February 2012

Project 8: Swedish Fish Valentine's Day Cards

My husband loves Swedish Fish more than me. Well that’s not strictly true but it’s as close a statement of fact as we can get in addressing his affection for the confectionary fish.

So imagine my delight when I saw this lovely card on Pinterest! It was a blessing and a gift because it’s a) a gift that he will actually like and b) incredibly easy to make. Score.

This is my version:

I’ve used a patterned bubbly paper that I got free from a craft magazine about 2 years ago and then used some sweet new red pens that I got for my birthday (thanks Mom!) and mounted the greeting onto a denim effect paper. Fill with fish and then presto, we’re there.

I have no idea why I bothered with doilies and calligraphy in the past. He doesn't care. Doilies don't have red e numbers.

Happy Valentine’s Day everyone!

Monday 6 February 2012

Project 7 : Birthday thank you cards

My birthday is coming up so I wanted to make sure that I had a supply of thank you cards ready for all the gifts. That sounds greedy – I’m probably not that popular – but it’s afforded me the opportunity for this week’s post.
I had the day off as I stayed up until 4am watching the Superbowl (come on Pats, that was embarrassing) and I had the time to dedicate to some more interesting layouts. I went to Mojo Monday for my layout as I want to be entering more blog challenges. First entry today!
This is my favourite layout: pretty in pink and an opportunity to use some rosebuds that I haven’t found occasion to use.
The next one could almost qualify as a boy card but the buttons make it a bit twee. Still, I like the bold colours. I made about 3 of similar papers but I won’t bore you with every variant.
This one uses a music print paper and I’m not convinced by the mix of the pattern and embossing folder. But it’s alright!
And then I did a variant without the greeting because I thought the busy papers were enough of a focal point.The mirrored purple paper is a bit blinding there. Apologies.
Will link this badboy up to Mojo Monday now!

Thursday 2 February 2012

Project 6: Groundhog Day treats

It’s Groundhog Day in the US and I love the idea of celebrating this. It’s our managing director’s birthday today and he’s technically American, having been born there but immediately leaving to be raised in Britain with a Home Counties accent, so I decided to celebrate this. Our MD has some serious baking abilities that we constantly tease him about. He will stay up half the night with his wife making the most incredibly complex cakes (he made an interactive carousel cake that had horses and glitter and lights and it was a thing of wonder in the end) and I thought – hey now, let’s make something crazy and celebrate Groundhog Day at the same time!

So I found these groundhog cupcakes and couldn’t be asked to make the cupcakes so I just made the groundhogs. He’ll never know that there were supposed to be cakes.

This is what a groundhog made of a Mars bar, chocolate button ears and cheeks and marshmallow eyes and nose looks like:

I think it’s awesome.

An army of them looks like this:

But if you want to be really impressed and see the original, look no further than here.

The person who created these not only put them on sticks to go into cupcakes but also put them on push-pops so that the groundhog can come out of his hole to look at his shadow. And she puts crumbs on some for a shadow. Really? I mean I’m impressed but sort of intimidated at the level of detail. Good on you Sweetology.