Showing posts with label Heat Embossing. Show all posts

Thursday, 11 October 2018

Project: Masculine typewriter card for MAWTT


I love challenging myself to use some of my older stash, or things that I forgot I had, or things that I loved once but haven't used in some time...and today's card is a perfect example of rediscovering the joys of my craft room. 

Our challenge at Moving Along with the Times this week is to make a masculine card. While I have plenty of 'traditional' stamps and images I decided to make this for someone specific and tailor it to him. A really good friend is turning 30 and he's a writer so I decided to make his card featuring a Stampin' Up typewriter. 

I made the background card with an alphabet stamp that came with the typewriter and repeated it down a piece of white card, which I then die cut with a spotted border die. There are some awkward edges from the alphabet stamp but I actually kind of like it. I sort of wish I'd inked the edges for extra distressing but I didn't think of it. Oh well. 

I heat embossed the typewriter image in white against a black card to make it stand out and then I added a 30 in a white gel pen. It's a fun little card and totally meets the brief. Can't wait to see what everyone else comes out with this week! 


Friday, 28 September 2018

Project: Birthday card with all the skills


The trouble with one of your best friends being a card maker is that you really have to pull out all the stops for their birthday card each year. It can't be some 'threw it together this morning as I forgot' nonsense that I get away with on other friends. Nope. For Claire, I have to make it technical and complicated!

So this year I was thinking what to do and I was reminded of a technique we did when we first started out - stamping over a few layers and splitting them out in the layout. We used to do this literally over multiple sheets but I wanted to feature dies so instead I did a layout over one sheet that I could cut out with nesting dies. 

I used a Studio Calico sentiment in the middle and then used some big graphic flower stamps from a magazine freebie arranged around the edges. I heat embossed everything in black, then blended using Distress Inks. I layered up the spotted rectangle dies because I liked the little dot details that it brought to the layout - makes it feel a bit more contemporary and tropical. I layered them up using foam tape and over a black card to make it stand out and tie back with the embossing. 

Happy birthday to my dear friend for life, Claire, who is crazy and loving and generous and brilliant. Love you man. The dog loves you most. x

Sunday, 2 September 2018

Project: Masculine blog challenge


I was catching up on making some birthday cards for friends this weekend and the sketch at Freshly Made Sketches was too much fun, I knew it would be great for making a card for my friend Nick. 


 The featured sentiment is a favourite one of mine, I've had it for about 3 years and the bow tie stamp is about the same though it may be older - maybe 4 years? Either way I thought it would be fun to play along with the Anything Goes challenge at Retro Rubber: 


I liked how the sketch challenge had the sentiment called out so I decided to heat emboss it as white on a charcoal stock. I used a red ink on red textured card for the bowtie and fussy cut it out. The background is a fun paper that Claire gave me with fun little definitions and sketches. One was poking out under the sentiment strip and I thought it was a bit awkward so I added a little strip of a scrap paper that I had on my desk that I thought kind of went with the colors. 

All in all I'm really happy with how sharp it is, my friend Nick is very dapper and will get a kick out of it. Fun to get back from my vacation and get back into the blog challenge game. 

Monday, 30 July 2018

Project: Giant ring sketch engagement card


A friend at work just got engaged and I absolutely love his fiancĂ©, she's a good laugh and someone I seek out at work events when people bring their partners. 


The sketch at Freshly Made Sketches looked like it would be fun to play along with so I did some sketching to see how I could make an engagement card work and it came together much easier than I thought! 

I started with a white piece of card and I die cut it into a rectangle with a spotted border die as I wanted it to match the spots on the sentiment. I then heat embossed the square stamp in a gold powder and then I really carefully blended the edges in Broken China distress ink. I just wanted a hint of blue as the white was really stark and I didn't love the contrast before I blended, it looked unfinished rather than CAS and the touch of blue evened that out. 

I die cut a piece of glitter stock paper into a ring using two circle dies and then used a big comedy heart gem stone from the pound shop.  All in all a really fun little card that stays playful and CAS. Job done :) 


Thursday, 21 June 2018

Project: Feature florals at MAWTT


This week at Moving Along with the Times we have a fun (and hopefully easy!) challenge for you: use florals as the feature. We all have so many flower stamps it's fun to make them the hero. 

I decided to use a set from Creative Stamping magazine - I think this particular set is from 2015? 2016? - and I heat embossed it to make it really pop. I used Distress Inks and an aqua brush to make it stand out against the watercolour paper. The background is lovely - my last precious sheet - from a Trader Jane set I got years ago as a gift. And then the sentiment is Penny Black - I decided to put it on an angle to give it an unexpected modern twist. I love the gem tones and overall effect - hopefully it provides some inspiration to you this week! 

Sunday, 4 March 2018

Project 464: A sweet 1st birthday card


My niece's birthday is coming up and I decided early on to make her an owl card. I have given her a lot of owl gifts and books and decided that it would be perfect to match this with her birthday present.

I chose a Unity Stamp Co image that is 2 years old (maybe 3?) and I loved the challenge at Retro Rubber - the sketch was perfect for a cheerful kid's card:


The owl is heat embossed on a white circle (in hindsight I think it's too big and I should probably have cut it down smaller) and then I added some punched balloons with hand-drawn strings. I added the blingy 1 for my niece as well. The backing paper is from my stash - I've had it for years and years and thought it was really fun for the card. The sentiment is die cut from a Sizzix set.

I love that little owl, I think it will go so well with the little owl gift I have planned for her present :)

Monday, 26 February 2018

Project 463: A country-walk inspired card


A colleague asked if I would make a card as a thank you for a weekend stay in the country. Specifically they wanted a card that was country-inspired without featuring too many flowers or animals.

The headline card was the one inspired by the brief. I used two magazine freebies to create the tree and fence scene which I heat embossed in black. I blended the background after die cutting the rectangle to make it a bit more atmospheric, I added the sentiment and birds using dye ink instead of embossing as I wanted the textures to be different. The touch of string was to add texture though truthfully I don't love it now!


This was another card I was just playing around with on my desk and it doesn't really work with the brief (too flowery) but I do like the simplicity. I die cut the tree and used distress ink to get the color and texture. I added these sweet little flowers that I got at Michael's just after christmas. I was going to add them to a square but decided the hexagon was a bit more modern. The thank you is also a magazine freebie.

A fun little session and a good mid-week brief.

Monday, 29 January 2018

Project 459: A London thank you


A colleague just bought a house and had to ask a massive favour of another colleague in order to make it work. She wanted a thank you that was deeply personal and after talking to her about it we decided a watercolour London scene was exactly the right note.

I started by heat embossing the Tim Holtz stamp from Claire on watercolour paper. Then I used Distress Inks and a water brush to get a grey and blue sky effect. I added a Mama Elephant thank you set in the corner that would offset the skyline and hold its own.

I decided to triple mount it for a touch more elegance. Really happy with it and my colleague loves it too. A lovely little art project.

Monday, 22 January 2018

Project 457: A smooshed background valentine


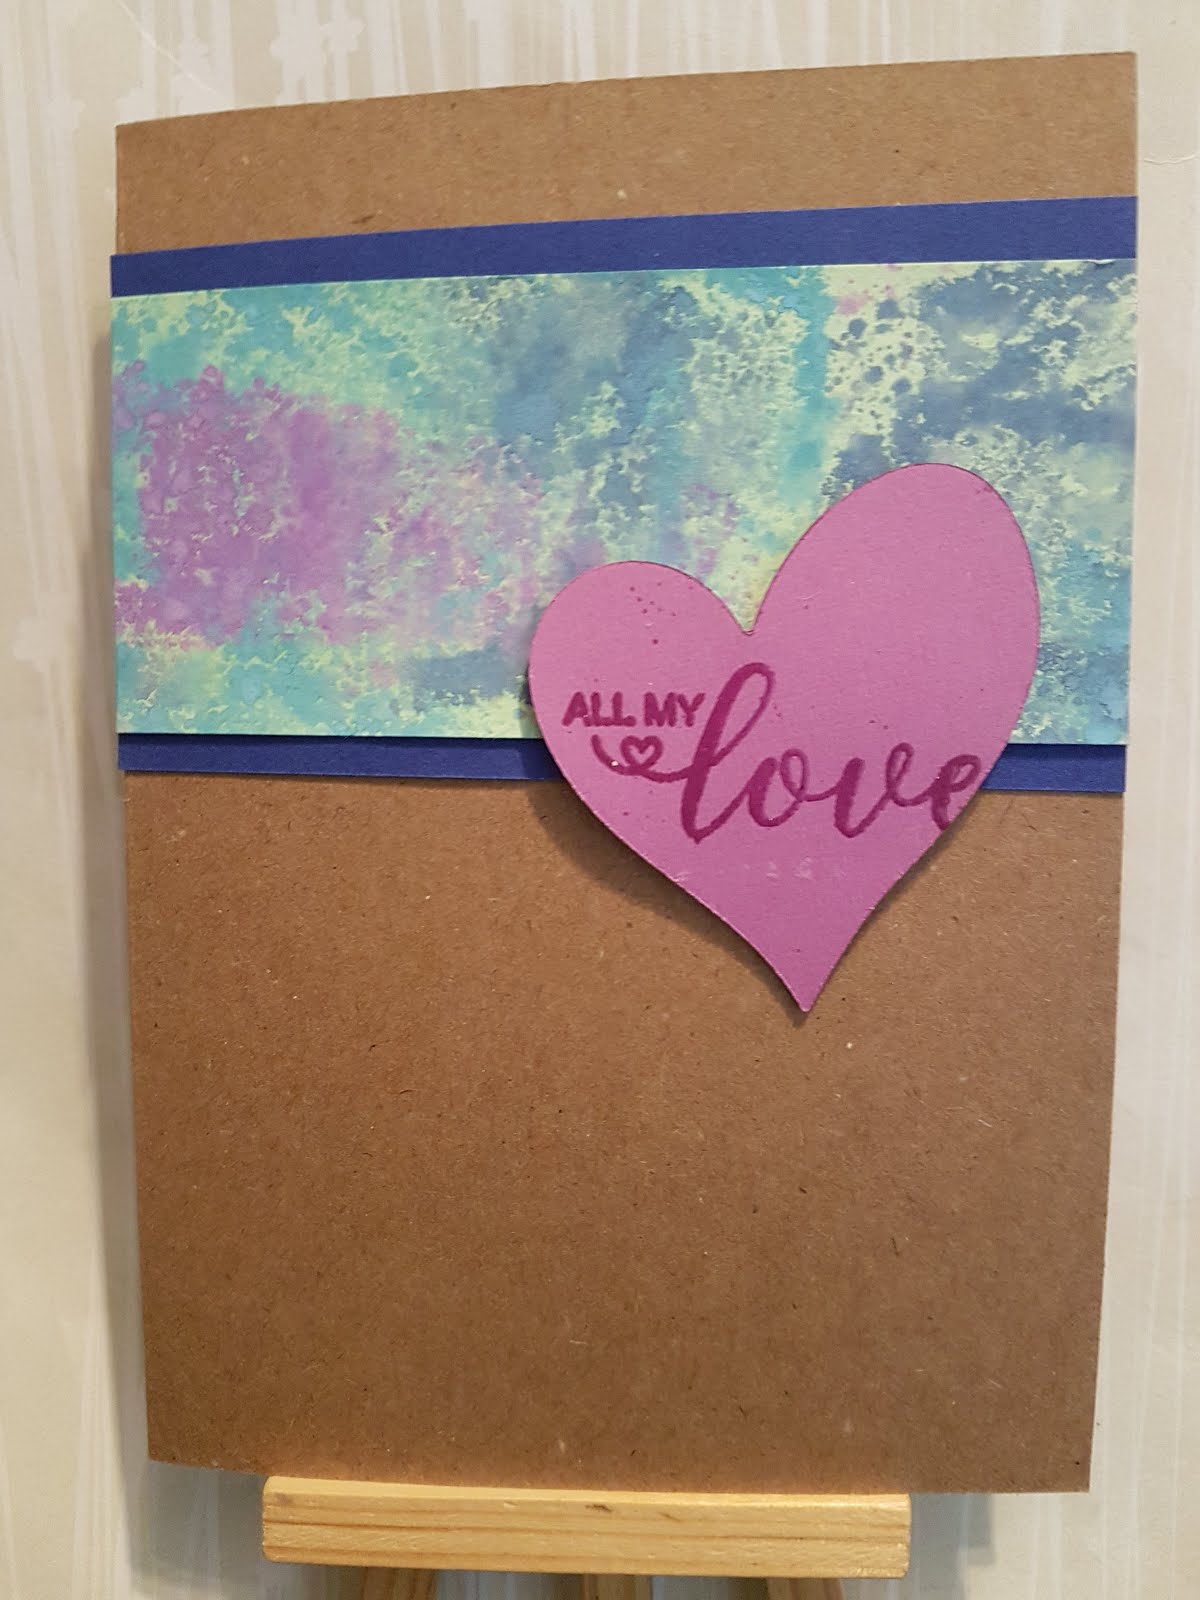
The layout at CAS(E) this Sketch looked really good and I wanted to do something that was natural and not overly girly. I decided to go for a smooshed background in Distress Oxides and layer it against kraft, not white. I used a die cut purple heart that was left over from the card I listed yesterday and then heat embossed a sentiment that I got free from a magazine. I raised it on foam to give it a tiny bit of texture. I kept it super simple, I tried adding dots, bling, all sorts and I decided that keeping it plain was best. Really happy with this simple card, I think it's a great alternative to some of the OTT ones I've made before!

Sunday, 21 January 2018

Project 456: A masked heart valentine


I saw the challenge at Freshly Made Sketches and thought it would be a a fun one: 


 I know it said any shape but the heart in the sketch layout inspired me. I also saw that Paper Players is doing a CAS Love challenge as well as CAS on Friday doing a Valentine's challenge. 

I started by die-cutting a heart from a scrap and I used the leftover bit as a giant stencil. I blended a heart in Broken China Distress Ink and then added some Seedless Preserves in a stencil of hearts. I then die cut a peephole heart in the bigger heart to reveal the stencil detail. I heat embossed an arrow from a stamp set I have had for ages and then fussy cut it out. I don't love it, I kind of wish I had left it as a strip. Oh well. I added some pearls and a strip of black bling to add more texture. Really happy with it, nice way to start my Valentine's collection. 

Wednesday, 17 January 2018

Project 454: A day of NBUS


My desk fun continued and I decided to take a break from challenges to play with some more new stuff. These cards are pretty unrelated in technique and style but all involve a bit of new stash.

The headline card is one that was made with a stamp Claire gave me for Christmas. I heat embossed it in black so it would pop out. The background was made using smooshed Oxides in purple and red. I love the effect. I die cut it and thought it looked better on black than white. All week I've been playing with the stickers in Tim Holtz Ideology collection and I thought this one was particularly relevant to the image.


This is a bit of fun I had with a patterned paper in my stash. I got a new label die in a Technique Tuesday sale and realised I could make the pattern stand out around a sentiment. I used a circle die that I had erroneously cut out for another project so thought it could save it and repurpose it here. The stamp is from Paper Source and I used some little star and flower dies from the same die set to mask a little ink oops. But it's really modern and sharp and I think it's great.


This was made using a new paper pad that Claire gave me and a new rose die I got from The Works. I blended the paper in dark blue before die cutting it and then I embossed it in glitter powder to make it pop a bit more. The sentiment is also from Claire, it's a lot of fun. I kept the rest of the card clean and ornament free.

Had a lot of fun just pottering around the desk, even if the output is a bit random!

Tuesday, 16 January 2018

Project 453: CAS color and sketch challenge combo


I had some time off this week so I decided to have a play at my desk. I thought I'd combine the sketch challenge at CAS(E) this Sketch and the color challenge at The Paper Players and see what I could do: 


I have been wanting to use this Unity Stamp Co that Claire gave me and thought I'd give it a go as it sort of matched the layout in the challenge. I embossed it in navy powder and colored in the flowers using a mix of lime green and turquoise ProMarkers. I was going to close the wreath with a few individual flowers but when I was laying it out I decided that keeping it open was nicer. I added a Tim Holtz Ideology sentiment over a lime green scrap I had and I think it adds a modern touch where it could have been a bit twee. The colors are contemporary and that helps with the layout. Definitely happy with the combo.

Thursday, 4 January 2018

Project 450: CAS Flower challenge


This week at Moving Along with the Times we are doing a flower challenge. Nice and easy to bring us into the new year!

I decided to keep it CAS but use some fun techniques. I started by heat embossing a flower stamp and sentiment (both free from magazines, over a few years!) and then I die cut a circle from another sheet so I could create a mask to blend within. The Distress Inks are Mustard Seed, Picked Raspberry and Peacock Feathers. I felt like it was a little naked so I added some white enamel dots around the page. Ok, actually I'm hiding an oops where I smudged some ink on it!

I am also entering CASology challenge this week with the theme of Encourage. I'm giving this card to a colleague to cheer her up and I hope it does just that.

Hope everyone has a good first week of the new year. 

Tuesday, 2 January 2018

Project 449: Blending fun with new stamps


Happy New Year everyone!

I got a bit off my blogging game end of last year but I want to start this year off with a bang. I had an AMAZING exchange with Claire and she gave me the most excellent bounty for Black Friday and Christmas. Plus with all my sale goodies I wanted to sit and play for a few hours after coming home before coming back to work.

I decided to do some really good blending fun so I could get exactly the colors and textures I wanted while showcasing some of the new toys. The headline card was too much fun. I embossed a big woodblock peacock feather stamp and then blended with a trio of inks. The sentiment is a lovely big one that I haven't used yet. I had to use the 'I wish I were a Mr Misti' tool a few times to get the dark ink to come through but that is exactly what that tool was invented for.


This little trio featured a new stencil. I used the same Broken China distress ink with the same Paper Source thank you stamp. I played with different adornments, from a little rose stamp, a big wreath and a few tiny little bird and flower stamps that I combined to make a pattern. I think the roses are my favorite. I added glitter glue to all of them just to give a tiny little pop.


This one features some paper smooshing and x3 scraps - the background, frame and die cut are all from scraps on my desk and I am thrilled to have them come together on this little 4x4 mini card. The thank you is from a second hand set I bought a while ago and I don't think I have used this one previously. More NBUS gets an outing! 


This one features blending with a watermarked chevron, a dark thank you banner stamp (that you can't really read) and a giant anchor die cut from the stash. It's so bold and watery, I love it! 


Finally this guy is just great. The little squirrel was from a BF sale and I decided to have him hold a balloon. Why not? The giant sentiment is new from Claire, another major win. And I'm using it for my husband's birthday as he loves squirrels and I think it works perfectly for the occasion. A great return to crafting for 2018. 

Thursday, 21 December 2017

Project: Anything but a card for MAWTT


Hello and happy almost Christmas! This week at Moving Along with the Times we have an 'Anything but a Card' challenge for you. Luckily this time of year everyone giving gifts needs gift tags so this was a great opportunity for me to make a fun set.

I started with a fun deer stamp that I haven't used much despite having it for some time. I heat embossed it in black and white directly on a tag. I then blended the background using a mix of Distress Inks and Distress Oxides. I took two large background stamps, one that has a random sort of smooshed-texture and the other that is a moroccan tile pattern and used Distress Inks sprayed with water to get irregular prints. I added some paint flicks for good measure.


I tried a different image but it was a bit too busy given the complicated background, so I stuck to the deer for the rest of the mini set. I really liked having a messy play, it's always fun to get away from cards and mix it up a bit. Can't wait to see what projects you come up with!

Monday, 6 November 2017

Project 447: Some modern colored Christmas cards


I had a playdate with Claire this weekend and we were trying a few new techniques we found on Pinterest. We both had a few learning curves that I thought were pretty funny!

The first was not he headline card, where you mask off stripes and then blend in between. I decided to do a but and purple striped card and then heat embossed a reindeer to go over top in a matte gold color. The sentiment is from the same set as the reindeer, I think I've had him for about 3 years. I think the white stripes are a bit too wide so I need to try to get the balance right. I tried doing it with skinnier stripes but unfortunately that to extreme difficulty trying to blend in a smaller space so there are still some trial/error adjustments to be made!


This little guy was another little play, using a big snowflake stencil and then using Distress Oxides instead of inks on top. They are so chalky and a dream to work with. I don't love the blending work here but I think that is something I could get better at.

All in all a few fun techniques for a short playdate!

Monday, 2 October 2017

Project 441: A mini-masked and heat embossed Christmas card


I saw the layout at Freshly Made Sketches and thought it would work perfectly with a wreath to make a Christmas card. Please forgive the bad lighting of the shot!


The stamp is a freebie from Creative Stamping magazine set I got earlier this year (Feb? March? I used it for Mother's Day cards so must have been before that!) and I heat embossed it with Platinum Ranger embossing powder. I used Peeled Paint Distress Ink to blend a little stripe that I masked off behind the wreath. I added a sentiment with a lot of flourish as I thought it suited the wreath. I've had that set for years, Claire gave it to me as one of my first Christmas sets. I added little touches of enamel accents to make the berries pop and some white as accents.

I kept it really CAS as I like a minimalist Christmas card - I just wish I had taken a better photo!

Thursday, 28 September 2017

Project 438: Glitter paste fab birthday card


We're having a geometric shape challenge at MAWTT this week so please join us. Without even realising how perfectly it would work out, I made this amazing card for Claire's birthday - and I can't wait for her to get it.

I used Nuvo glitter paste with a Recollections hexagon stencil, and then heat embossed a sentiment from a Creative Stamping magazine on a die cut fancy label. I decided to keep this really simple, just adding a little flower and a stitched border. It's fancy enough and this leaves it to have more impact.

She taught me how to use glitter paste on our recent weekend away and I have absolutely loved playing with it. She is a great craft teacher, a great partner in crime, a great colleague and more than anything else a great friend. I hope she enjoys the present and card as much as I've enjoyed putting it together!


Wednesday, 20 September 2017

Project 439: A colorful bon voyage card


One of my colleagues for 4 years is leaving and I'm sad to see her go. It's been fun working with her and her spontaneous free spirit will be missed. I wanted to make her a fun card and thought the colors in Color Throwdown this week would be perfect.


I heat embossed a full set of feather stamps in white on watercolor paper and then used Distress Inks to watercolor the background. It's a bit paler than I wanted but oh well. The green dots are enamel accents. I am pretty happy with it, I hope she likes it too!

Saturday, 2 September 2017

Project: A celebratory sketch challenge


Happy Saturday! This week we've got a fun sponsor, Pink Gem Designs, and a really fun sketch to pair with it:


I decided for my take on the sketch I would invert it so the bigger panel was on the left and the small boxes on the right. I used Cat with Glasses and colored her with ProMarkers. I die cut her out using a stitched rectangle and then heat embossed x3 sentiments from Endless Birthday Wishes and used a smaller die for those. The background paper is Lawn Fawn and the strip of gems is Poundland.

I hope you enjoy playing with the sketch, be sure to enter by the 8th of September!