Showing posts with label Edible crafts. Show all posts

Monday, 4 May 2015

Project 217: Some wine tasting cards

This is a really small little project but it was so much fun I had to share. Two of our friends are getting married in France this summer and they brought back several wines to taste to make the decision of what to serve. I mean, French wines, French foods, we know it's going to be a great party. And we were lucky enough to be invited to the pre-party to decide which wines to serve.

I thought I'd make it a bit of fun by doing a blind taste test.

I made these little taste cards and tags so we could have a blind test without being influeced by the bottles and I thought they'd be a nice momento for a scrap book


I wrapped the bottles up in scarves to hide the labels and with the tags we could tell how to rate each one. The night was a huge success and (almost) all of the choices were unanimous votes so that was a win.

Looking forward to trying them again at the wedding in July. More cards to follow this week, it's been an epic weekend of clearing and cleaning so craft time was harder to come by than I thought!


Saturday, 11 April 2015

Project 216: A very special hamper


We have a little tradition in my group of UK friends of getting together for a fancy gift when someone turns 30.

We have a friend who deserves some luxury consumables and we decided that a big trip to Wholefoods to put together the hamper would be a fun group activity. We bought things we know she'll love, picking out things to her taste, and then I bought a nice basket and wrapped it up with some ribbon and acetate sheets.

I also made the group card and that's the headline shot. I saw this great tutorial on how to make an 'exploding' box and I thought it'd be perfect for this occassion so the card is part of the hamper goodies.

I cut out different shades of peachy pink card stock and cut them to size. I don't have a scoring board so I was doing all of the folds with a bone creaser and ruler - probably easier with a scoring board but I don't do a lot of this kind of work so I was happy to use the tools I have.


I then covered the different pages of the box with little Polaroid images and signed the names of all of the contributors to the hamper - all from the Neopolitan Recollections stack at Michaels. The back page is covered with stickers and words from the same pack and they were so cheerful and fun they really fit the theme of the gift and our friend's personality.


On the outside I spelled out her name and topped the lid with a chipboard bicycle sticker. Above is what it looks like when you assemble it like a box.

I'm so pleased with the packaging and production of this card, it really came out better than I thought it would. We deliver it to her next week so I hope she likes it!


Sunday, 22 February 2015

Project 205: RIP Car cookie bags


This Friday night I went to the pub with some colleagues (and the dog) and asked if my husband wanted to join. He knows the people I work with and it's a short bus ride from our house to get to the office's local pub. He wasn't in the mood to drink so he decided to drive over, hang out for a while and then he could drive me (and the dog) back home.

And then the car broke down about 3 blocks from the pub.

My colleagues are lovely people and generously spent the next hour finding the car, pushing it to the pub (it was blocking the road and that way we could keep an eye on it from the comfort of a table with a pint!) and waiting with us until the tow truck came - about 3 hours after the breakdown.


In short: they deserved a treat for their epic loyalty. (Yes, I bought them all beer at the pub immediately after it happened as well)

I decided to make cookies this weekend and give them as a reward. It's also my MIL's birthday so I wanted to bring some along when we go to their house for dinner tonight.


I made 2 dozen normal sized Smarties cookies and 6 double-sized cookies. (US people: they're like M&Ms but not as good. Tragically the shop by me doesn't sell M&Ms so I had to use these instead.)

I filled card bags with the extra big cookies and attached a mini card to all of them that had an old car stamp and a scripted RIP stamp on the top. (Car stamp is from a Recollections vintage travel set and the letter stamps are from my local pound shop - tricky to use but perfect here.) 


Yes they're crooked, yes the stamp is cracked - I wanted it to feel a bit old and spooky and just slightly off. Plus - they're 6 guys getting cookies so they don't care!

I stapled the card to the top of the bag and it's an instant goody bag I can give to all the lovely guys tomorrow when I see them in the office. (see headline shot)

Now we need to get a new car (says my husband) but I'd rather spend the money on just about anything else. Let the battle begin!

Monday, 10 February 2014

Project 132: Cakes and Cocktails


It was my birthday this weekend and I wanted to do something a bit festive as we've finally unpacked (most of) the flat from moving before Christmas and nobody has been able to come see it yet. So I decided to throw a cake and cocktail party as a housewarming/birthday bash.

I try to live life by the famous Julia Child quotation: a party without cake is just a meeting!

So what did I make?

SO MANY THINGS!

First was a little lemon drizzle cake shaped like an owl. My friend Paloma bought me an owl cake pan and so I had to give him a debut for the party: 


I iced him with a lemon glaze and then topped him with some cherries, orange and lemon candies to add ears and a bowtie. Because of course an owl needs a bowtie. 

Next I made filo pastry baskets by layering filo in muffin tins and then once they'd cooled, I filled them with  creme fraiche and vanilla with blackberries, blueberries and raspberries. 

The little candy display was a gift from our friend Beth (she knows we have a sweet tooth problem in our house) and so I made little paper wallets out of craft paper to go with the retro sweet-stall vibe:


Then I needed some cupcakes - yes needed as who doesn't love cupcakes - so I made these blackberry jam-filled cupcakes from Good Housekeeping. "They are the best cupcakes you have ever made" said Olly. High praise indeed.


Finally I needed something chocolatey so I made two types of chocolate truffles: rum and peanut butter. Both were delicious though I had a real soft spot for the peanut ones.


Now to the cocktails! I copied a drink I had over Christmas at our family friends' party which was prosecco, pomegranate juice and pomegranate seeds. Super classy and almost healthy. I put out blackberries and raspberries for garnish as well.

The second was a tropical rum punch of my own creation, featuring a caramel coconut rum, pineapple juice and soda water with some fresh pineapple garnish. Fantastic.

Someone brought creme de casis for Kir Royals as well so we had almost as many cocktail offerings as we did cakes.

That's me in my party dress that I treated myself to the day before the party!

It was a great party and a great day and I was lucky to spend it with a dozen lovely friends - missing all of those too far away to see on the day! 

Saturday, 4 May 2013

Project 79: Cinco de Mayo festivities


Hello friends and happy Cinco de Mayo!

I know I have been a bit absent but I am hoping the craft extravaganza I am about to show will make up for it. 

I am throwing a Cinco de Mayo party tomorrow, less because of any Mexican heritage and more because I wanted to throw a party over the bank holiday for a few friends and this Sunday happened to be Cinco de Mayo. So sombreros all around!

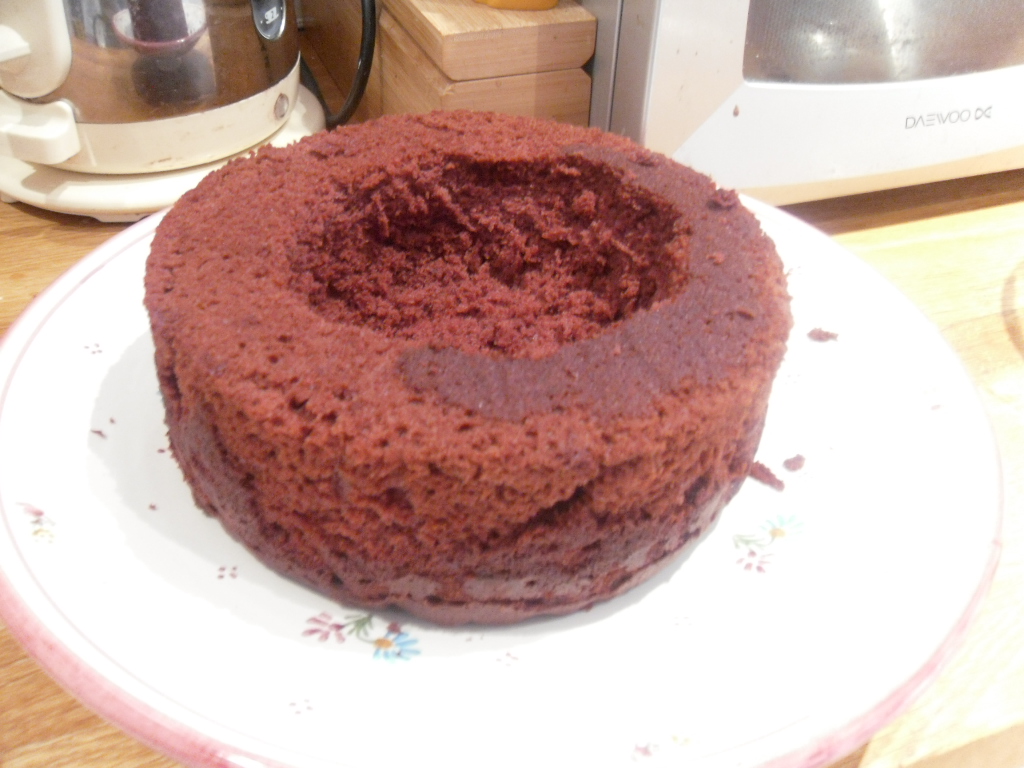
I wasn’t allowed to make a piñata as O thought it would be dangerous for us/our things/our friends to hit things with a stick after a few drinks. That makes sense so I decided instead to make a piñata cake, which is the headline picture following this blog’s recommendation.


After making one very deep layer and one shallow layer I hollowed out the deep layer and filled it with sweets. The blog says to hollow out the top but I made the bottom layer deep enough I didn't have to. I iced it and made a piñata template and carefully placed the sugar to get the layered effect. I will take pictures tomorrow when we cut into it to show the sweets pouring out.

Next up is a Mexican spin on bunting, taken from Martha. I love Martha. Also in the little series that I’ve linked to she has a recipe for some alcohol-soaked fruit and good snacks that I’m in the process of prepping as well.


These were pretty easy – I got a big bundle of colored tissue from the 99p store and then cut squares, then cut up the fringe. I taped them together and then folded over the top to have a string tucked underneath so I could hang it across the room.


Here I’ve made a “Pin the tail on the piñata” board using the same tissue paper fringe technique. I pieced it all out and then cut out the shape to mount on the board. I’m rather fond of my one-eyed burro.

Finally I printed out a few of these Cinco de Mayo posters from 1901 to put on the walls and doors throughout my flat.

I’ll take pictures tomorrow once I’ve put out the colorful tablecloths, napkins, plates, party poppers and confetti. It’s going to be ace.

Next blog post will be post-tequila shots… :) 


Wednesday, 13 February 2013

Project 67 Update


Just a quick update on the finished project since the weekend. I brought home the tray and straw-base from the office (we got a free hamper of goodies - I love my clients) and with two new additions (see below) we have the finished product.


Yes these messages may be the most hilarious of them all. ("Why two non candy things?" you ask? They were in the hamper from work. Yep, pawning off free stuff as if it came from the heart. Nothing else says true love.)

It looks cute all together - can't wait until tomorrow so he sees how ridiculous this is.

Sunday, 10 February 2013

Project 67: Candy-messages for Valentine's Day


Pinterest gives me great inspiration and this Valentines’ day I wanted to do something a bit silly and fun and found the perfect post. 

O has a massive sweet tooth and it’s well-known that he would pause too long if asked to choose between me and candy. I found this post and this post and thought, perfect, job done.

I went to a store and got as many candy bars as I could that I thought I could tie into an overly sentimental and sappy saying. The example on Pinterest are American so I had to improvise a bit.


First I made the tags. I cut the scallop tags with the new die cutter and used a star punch from my sister (it was my birthday in the week)  so I could tie a ribbon through it.

Each message was written out and embellished with something a bit cute and cheerful – it’s supposed to be over the top after all! Tape and glitter glue got used quite a lot which was fun as I don't always play them up on cards.


The one I like the most is the little rainbow bag made of layered Skittles and gold-wrapped Rolos. The Rolos aren’t individually wrapped here in the UK so I kept them in pairs which wasn’t ideal but never mind. The bags are from my last pack of 10 left over from the wedding over 2 years ago. Still getting use out of the bits and pieces left over!  


Here are a few close ups of the tags, I think they’re a bit silly but that was the point. I had wanted to do more of the individual stamped ones (like the button bear one – an inside joke, not a sickeningly sweet pet name) but I was nervous to do so many so stuck to fine-tip pens and markers. 

I tried to tie the ribbons into either the candy or message as much as possible. Turns out I own a lot of ribbon. 

I'm going to display everything on a tray, I have a base from a hamper we got at work so I'm going to bring that home in the week.

I am due a post using all of the fun stuff from my birthday bounty so watch this space. Happy Valentine’s day!


Wednesday, 19 December 2012

Project 57: Christmas brownie bites


Every year the highlight of our social calendar is our own mini university-reunion Christmas party. A core group of  about 12 of us get together and eat and drink our collective body weight in Christmas fare.

It is excellent. It is our way of reliving our college years without the embarassment of outsiders seeing/judging us.

This year I was delegated the "sweet treats" task and as the party is on a Friday night (and thus requires mid-week prep) I needed something that would keep for a few days and travel well on the day.

I found this recipe in Good Housekeeping. Perfect for advance prep and traveling in a tin.  Brownies always keep well as they are so wonderfully sweet and mosit...at least when I make them from scratch and don't use a horrible pre-made mix they do!

Do mine look as good as their version? Not even close.

I could have carefully spread icing. I could have placed sprinkles more deliberately. I could have generally taken more care. But I think mine are awesome. Sweet treats are brought out no sooner than when everyone is about 3 bottles of wine (each) in and knowing my audience won't care about the precision, I abandoned the effort and let white chocolate clump together and sugar stick to every surface.

I aim to get back on here just before New Years as I anticipate getting a bit of kit over Christmas (ahem last minute shoppers looking for inspiration) and will want to try some new tricks. And if there is no posting before Christmas (it looks unlikely...) then I hope you have a great holiday!


Tuesday, 11 December 2012

Project 56: Christmas jam and candles


What a weekend of crafting has passed!

Firstly: spiced fig and plum jam. I love making jam and last year I trialled this one as a Christmas gift for a few family members. It proved a success so I’ve made it again. Largely for the same people. If you are reading this and you are on the Tracy side of the family: apologies. If you don’t want this please let me know and I will find it a good home!


My mother in law gave me this beautiful jam pan for my birthday one year and it has really been a fine friend.  

This year I did a little trick with my craft kit, using a punch to cut my wax discs to size. Clever me! 


And finally, after what felt like 3 days of watching it boil, all potted up. Even though the recipe is from GH, my companion in preserves is neatly on the side there, a handbook on preserving published through River Cottage.  If you’re even curious about preserving this is a great investment.

Next up: candle making.

I have a problem when it comes to hoarding. I’m not a tragic case yet but we have amassed a large collection of useless little things. One collection is little glass ramekins that come free with our favourite pre-made refrigerated desserts. Mmmm Gu puddings…

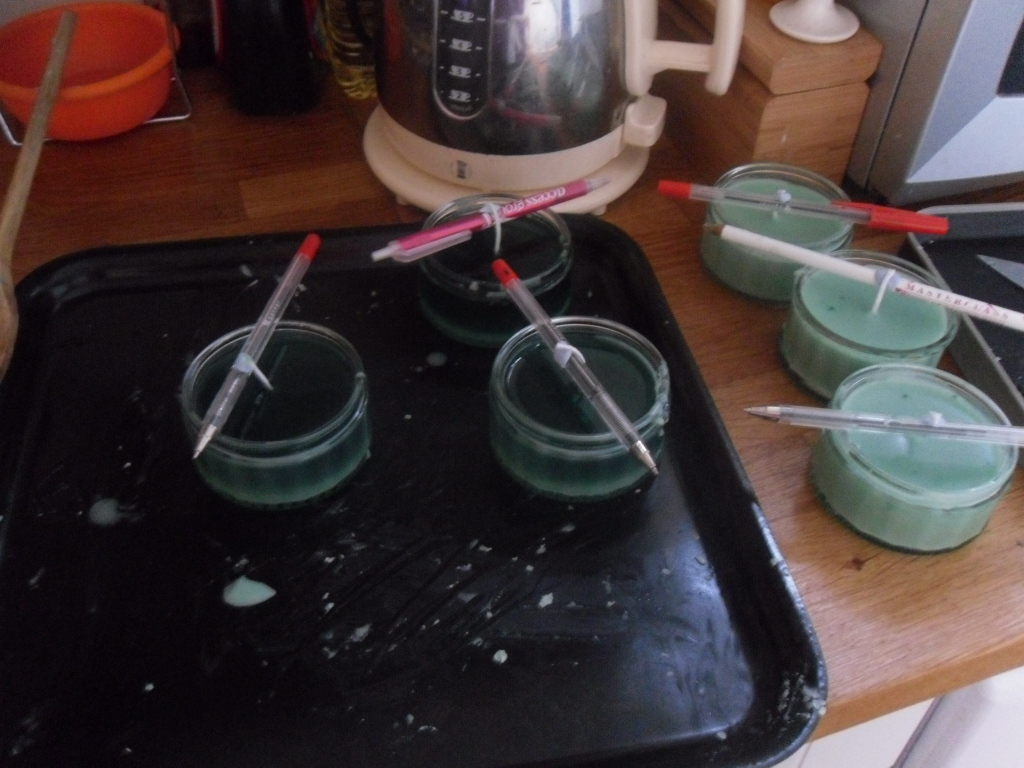
So with this collection I did some research and realised it would be very easy to turn them into candles. Quick bit of online purchasing and I had myself a beginners’ kit to make some container candles.


This process was a bit more involved but not overly labour intensive. You have to get the wick perfectly straight so you blue-tack it to a pencil lying across the top. (This is the tip in the instructions, not a fun fact from me. I used my clever innovative idea on the punch-cut-discs above.) 


Then you melt the wax in a double-boiler, adding dye and fragrance along the way. Pour it in and wait for it to set.

To dress them up as gifts (going into a gift set with the jam and these wreaths) I added some festive Christmas ribbon.


Wrapping things up: a bit of festive décor for the office. I decorated stockings for everyone in our office, bought some lights and little decorations and then wrangled the studio design team into carrying a tree home from town for me. Pure delight that I got all of this up with all the bah-humbugging in the office.

American friends – a note on spelling. I’m using my work computer and the spell-check is aggressive. I still think in American though.