Showing posts with label Sets. Show all posts

Monday, 6 August 2018

Project: Patterned paper simple thanks set


A really simple post today! I am going to be seeing my sister and mom soon and I like to give them little card sets when I see them, trying new or different things each time as they are happy guinea pigs of my designs!

I have all of these gorgeous busy-patterned papers that can be hard to work with in cards unless you make them the hero. I decided to pick some of my favorite prints from a set I got at Crop on the Cape and cut out 4 papers for each set. I used scraps on my desk and blended them in Distress Ink to get the rich mustard color that I could cut the sentiment from.

I die cut the sentiments and realised that the busy candy print needed a strip of white to support it against the busy paper. But otherwise these are super simple and modern and I think they will love them.


Friday, 6 July 2018

Project: Blended mini card set with modern sentiments


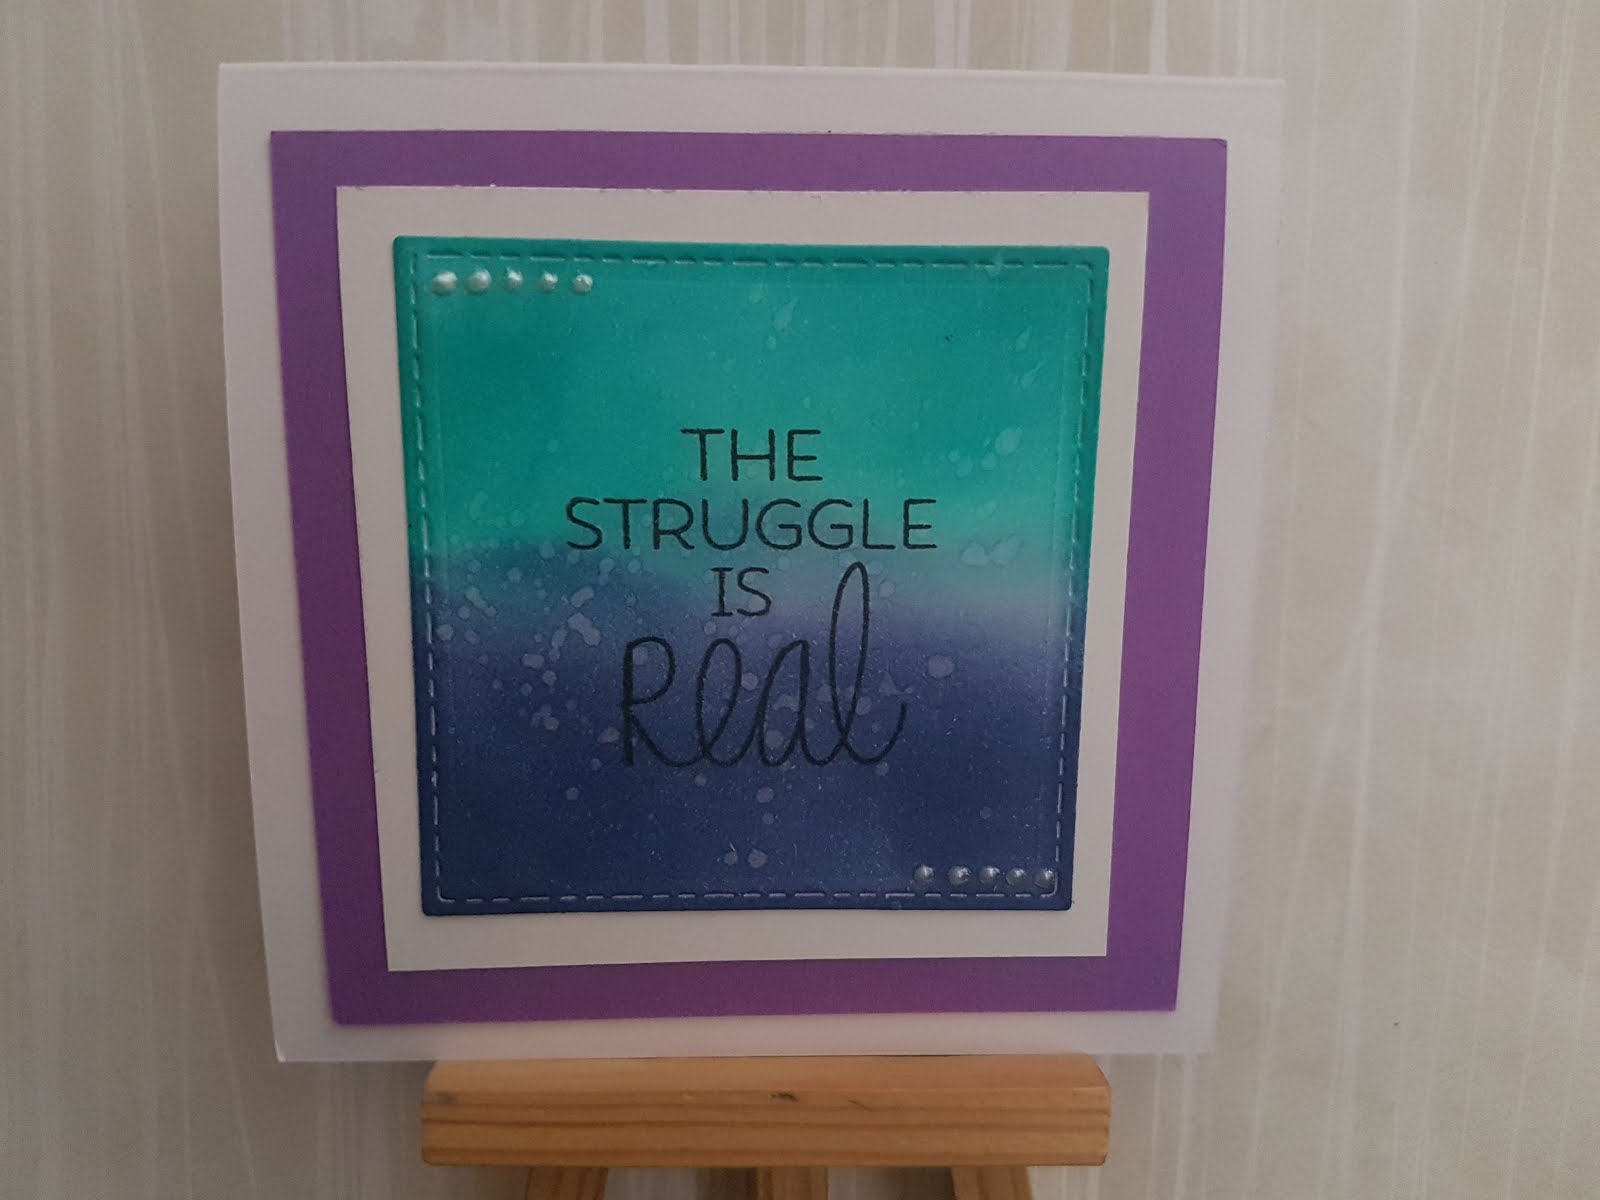
I love mini playdate challenges and Claire and I had too much fun talking this past weekend, it really inspired me to do some silly things. She was testing herself with one stamp set x4 cards so I decided to do the same. I started with an image set but actually landed on a sentiment set. These sentiments crack me up and I thought, why not make a mini card set and give them to a like-minded friend? 

For each one I die cut a small square and then blended a two-tone color scheme, making sure colors overlapped from one to the next but never repeating the same combination. These then got stamped with the big hero sentiments and, just because they were feeling a little plain, I did a double mounting of white and then purple, pulling them all together but also giving them a bit more visually. 

I picked up my little bottle of liquid pearl dots and added some accents to the corners. I don't love it - truth be told - but I guess that's just experimentation. I like the vertical ones better than the horizontal ones so that's a learning. 

Finally I splattered some water on them to make them a bit more irregular. Love the set, definitely doing this again with a few minor adjustments. 

Tuesday, 1 August 2017

Project 434: Scraps and dies


I wanted to bring a bunch of cards to my sister and mom (who I am seeing today!) and they said thank you cards and blank cards are the most useful so I concentrated my efforts there. I also wanted to use the dozens of scraps I had lurking on my desk so in a bid to clear out, I decided to make some of my dies work hard to use up the scraps and make some fun cards without too much planning.

The headline was a fun one to make - I really struggle with that big leaf die. It really only works with really thick card and the little holes are an absolute challenge to get out cleanly. I got one clean one, ruined 2 other scraps and abandoned my plans for a set. The background is from a small square pad and I used a stitched die to get a border. The tag is punched and stamped and it came together with just a handful of pieces.


These came together through a collection of scraps. All the papers you see here were die cut or trimmed to size. The green paper on the cactus sheet was stamped using a chevron background stamp but otherwise it's dies only - no stamps at all. 


Finally I thought I'd show this set. These papers are prized possessions but I decided my sister and mom were worth it to use them. I die cut some giant scottie dog dies in different purples and then added a tartan paper with a candy - super simple.


All in all a pleasing collection! I can't wait to see which my family go for.

Tuesday, 6 June 2017

Project 420: Set of daschund cards


I stayed home today as I wasn't feeling well and then, of all things, we got a leak in through the lighting and the ceiling  from torrential rain hitting our apartment building. Ugh. So I had to turn off the power, turn off the lights and wait for the building manager to come investigate.

So I made some cards while I waited! I have been wanting to make a set of cards for a family friend who loves daschunds for a while and thought it would be fun to have a little play. I stamped the four different dogs from a set Claire gave me, colored them with ProMarkers and then die cut them as squares. I also cut a spotted background and plain square and instead of a straight layer, I skewed it a bit.

I added punched balloons to the three that had strings - I thought it would add dimension instead of a stamped balloon. And some little enamel dots and that was that. Really happy with the set, I can't wait to put them in the post for our friend.

Sunday, 18 December 2016

Project 385: A final doggy set


This final set post is for a girl on the team about to leave so I'm showing her leaving card as well.


I kept things super simple here. Her little dog is a friend of my little dog (friend is a strong word, more like pint-sized bully) and like me she lives for that dog. She's Finnish, and has a great Scandi style, so I wanted it to be clean and simple in execution. I decided to simply stamp 4 paw prints, use different powders and heat emboss them. I'm featuring the gold and turquoise here but I also did silver and red glitter (which I stamped upside down. Oops. It kind of works though so I left it).


Her leaving card is also really simple, featuring a paper cut silhouette of her, the dog, a glass of wine and a little speech bubble with the brand mark of her client for the past 3 years. I debated a 'longing for you' message but decided against it, the simplicity is really nice and I think it suits her as well. I'll miss her so much and I am gutted to see her go. Hopefully there will be future visits from her and we can see the little dog again in the future!

Thursday, 15 December 2016

Project 384: More sets for Christmas


Set post number 2! I have been working hard on these the last few days. Yesterday I showcased 2 sets, today you get two more. These were much more personal to the recipients, not that the others weren't, I just spent a bit more time making choices on these.


The headline card and the ones featured here were great to make. The cards are from a Creative Stamping magazine freebie set that I either die cut or fussy cut and then colored using Spectrum Noir pencils. Rarely use pencils these days, it was great fun to get them out. I added glitter accents to make it pop out and then little touches of bling or mini pearls. Really simple but I think the recipient will like them.


And now these are just as random as you like. The colleague in question is moving from London to NY next year hence some of the featured stamps. The others are really just random things that made me think of her! I went fishing through my big wooden blocks and these are the ones that all seemed the best, I love going through those because they're not organised like my clear stamps, it's just a grab bag of fun. I painted the background with watercolored distress inks, really simple.


Wednesday, 14 December 2016

Project 383: First of several card gift sets


I am making a whole bunch of card sets as gifts for people. I should have started this process MUCH sooner but here we all are, crafting late into the evening to get things done before I see the recipients! I'm using it as an opportunity to go through my stash and use things I haven't played with in a while.


This is the first of a few card set posts. The set featured here was such fun. I stamped and die cut the fruit Sizzix set Claire gave me last year and used mini 4x4 cards as my base. The colored papers are from a Recollections square pack (no die cutting or trimming involved!) and I embossed them in different folders: the triangle is from Stampin' Up, the houndstooth is Sizzix, the swiss dots are Cuttlebug and the basketweave I can't remember. I added different sized enamel dots from Recollections to match each card. They took a bit longer than you'd think from looking at them but I really love them!


This next set was a bit simpler. I die cut some intricate butterflies and then layered them over punched hearts. I die cut big chevron patterned circles and added a few touches of bling and enamel dots. They would have been really quick if it weren't for the 8 die cuts required. Still, a very clean card and it makes a nice set for the person who is receiving it....thought I must say I prefer the fruit!


Saturday, 5 November 2016

Project 374: 6 takes on Christmas tags


I'm going to a girlfriend's today for lunch and it is a bit of a reunion as 6 of us are going to be seeing each other for tthe first time in a while.

I wanted to take a little hostess gift and though, why not take a little gift for everyone? As we're in November and it is finally acceptable to be publicly talking about Christmas I thought to make little sets of tags. All the tags are pre-made from my stash and I made x5 of each, in all different sizes.

This was a great project, really a playground for fun ideas, simple and more involved. The headline card is a heat embossed reindeer from last year's Creative Stamping magazine freebie set. It embosses BEAUTIFULLY as you can see.


This one used some lovely washi sheets (from Claire) as a background, topped with little Jolee's Boutique gingerbread men stickers. This is probably my favourite for it's cheerfulness.


This one was a 'fun with punches' moment where I used scraps of this warm tartan paper to get the hearts and then topped it with punched bows (also scraps) from a punch Claire gave me that I always struggle to find a use for. It's perfect here.


Next up is a fun Little Claire robin stamp that i colored with promarkers (fairly badly, as you can see) and topped with some red glitter glue. I wasn't feeling the coloring this morning so this is the only one that had it.


This guy features a random mix of small snowflake stamps from an ancient wooden set my husband put in my stocking years and years ago. It still brings me joy as it's so simple.


Finally I diecut some trees and added little glitter glue baubles to make them stand out.

So much fun playing with all these techniques, my original intention was to give a uniform set of each type to a different friend but a) I thought of a 6th concept to play with and b) I couldn't make up my mind to give what to whom. So I just did a mixed set of each for all of them. I hope my friends like them!




Monday, 3 October 2016

Project 366: Mini donut card set


My girlfriend Carrie is coming to visit me next week and I can't wait! Ages ago she commented that she liked this donut stamp set by My Favorite Things and I thought it'd be fun if I had something silly for her when she arrived.


I only made a few of these and here are my favorite two. For all of them I used an aqua brush and distress inks to create a simple background. The donuts are die cut using concentric circle dies and then a smaller ring created in a bright color for icing. I added individual sprinkles in contrasting colors from the set. The sentiment was stamped straight over the background to complete them. Really impactful for such a sweet little set, I hope Carrie likes them!

Saturday, 10 September 2016

Project 356: Blended monogram set


Short little post from me today! It's a friend's birthday today but she's super weird about birthdays. Hates them. Doesn't want to recognize them in the slightest. But to do nothing bums her out as well. So we're meeting briefly in a pub for lunch just as a get together for another friend's birthday and then we can sneak cards into her handbag when she isn't looking.

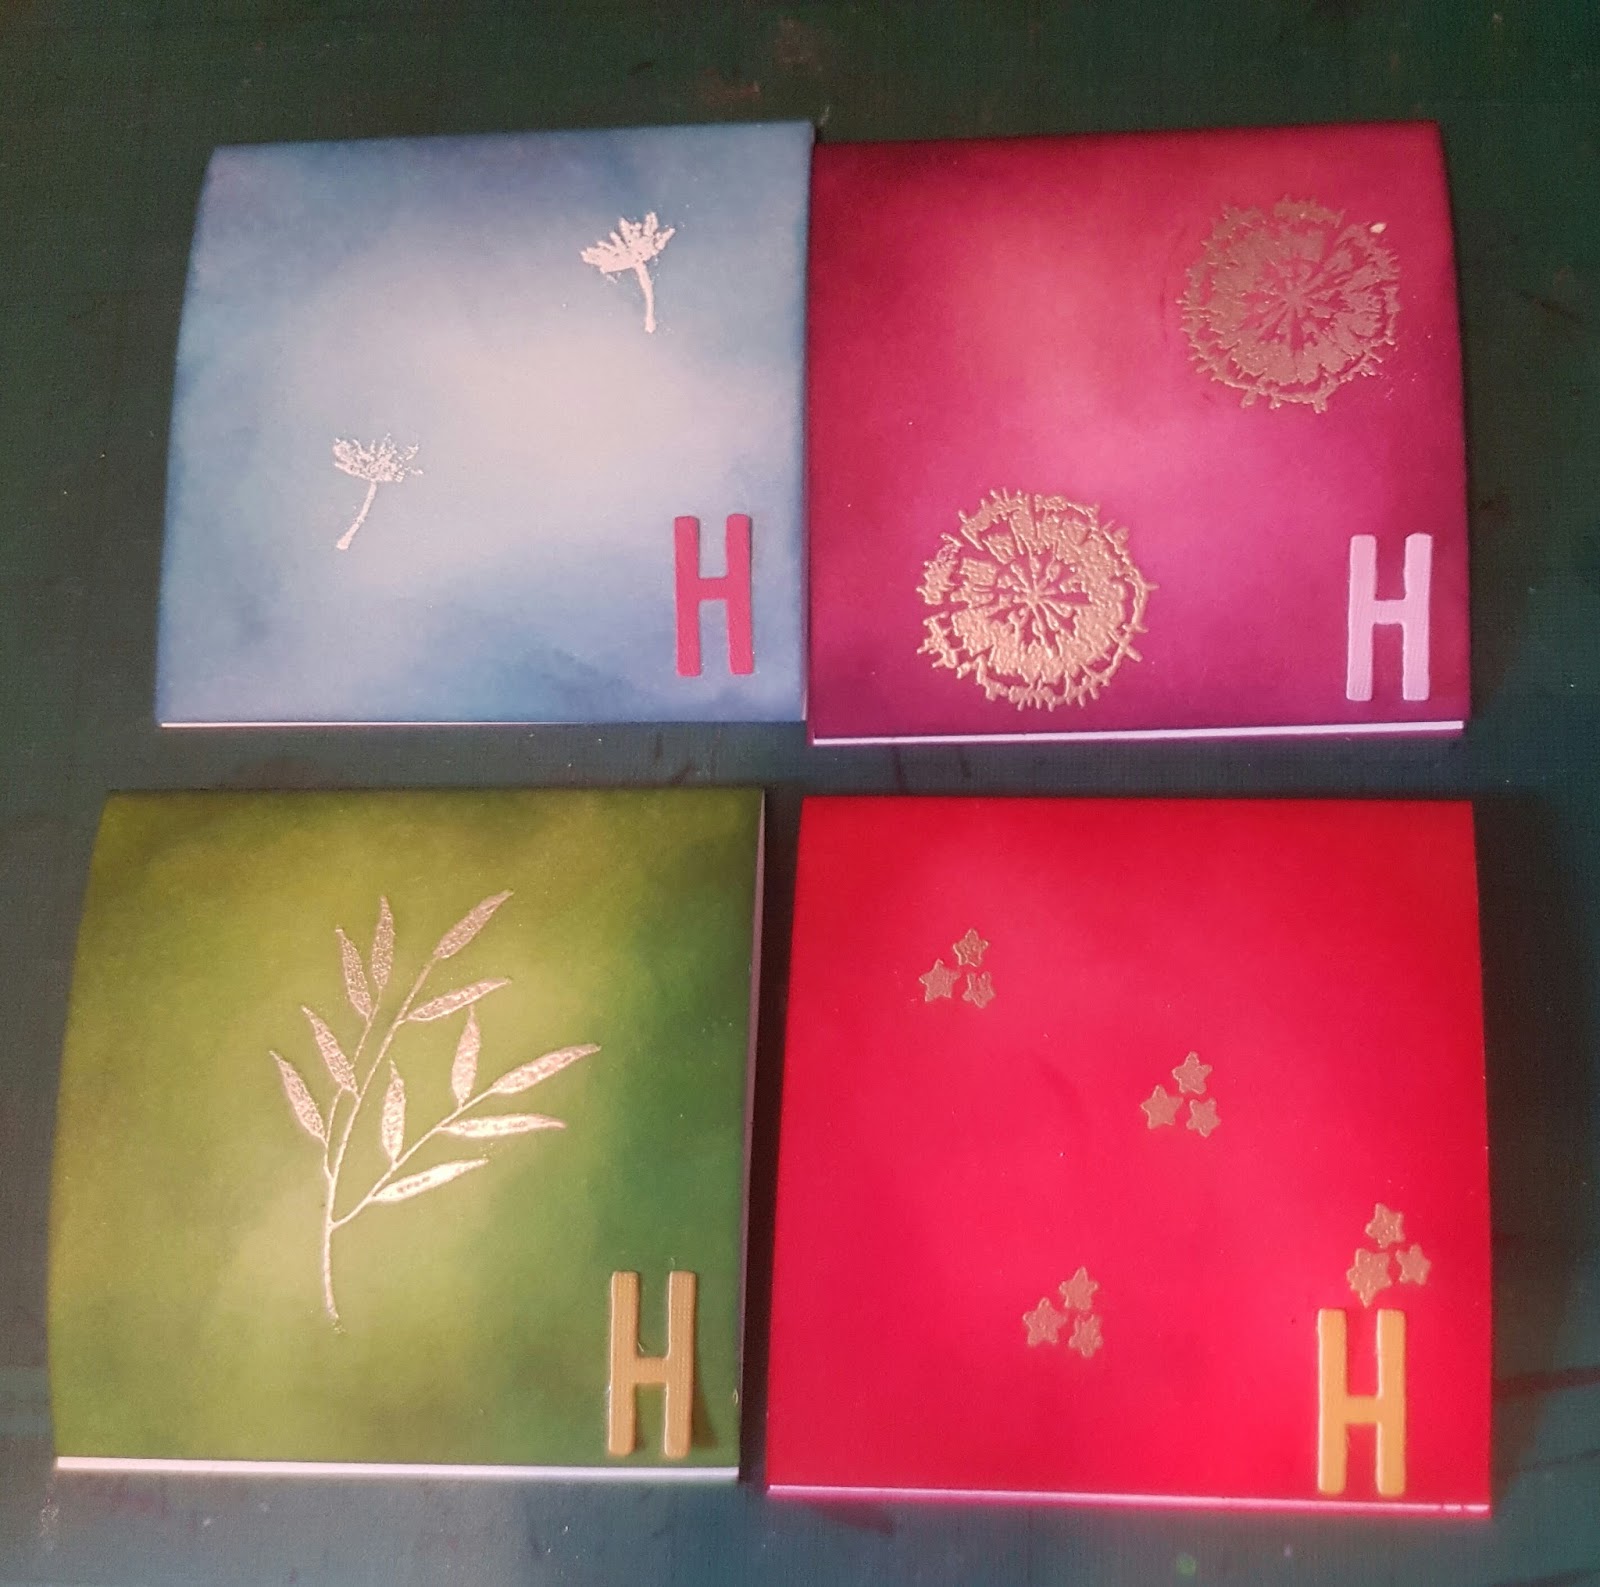
I wanted to make her a little something but she's kind of hard to define with her style. She changes it up a lot and so I can't always keep up! I decided to heat emboss some random stamps that struck my fancy, blend across a full 4x4 square card, adding a little die-cut H in the corner to use her monogram.

Here are the 4:


The stamps are from top left clockwise around: dandelion seeds from Balloon Celebration from Stampin' Up, tiedye splodges by Inkadoo, stars from Balloon Celebrations and Fossil Leaves by Inkadoo. 

The H is a Tim Holtz letter die. 

It took a bit of time to emboss and blend each card but I'm pleaesd with how it came out. 

Tuesday, 15 March 2016

Project 304: Super simple set with patterned card


My mom loves bright, artistic calendars and frames them month by month on her kitchen wall. 2015's calendar was from Papyrus and the monthly prints were really vibrant. When the year came to an end she sent it to me and, using some templates Papyrus provide, the papers can be turned into folders, book marks, boxes and patterned card. I have now used/distributed everything but the card stock so I decided to whip up a quick little set to give to my mom as a thank you for the calendar. You know what they say, one person's old calendar trash is another person's card-making treasure.


I used these little hummingbirds because I had a nice set of four images in different colors. I kept it super simple: trimmed down the paper to the same size, added a ribbon, cut down some black stock and added a white paper lining inside to make it easier to write on. Bish bash bosh: card set in minutes.