Showing posts with label Craft kit. Show all posts

Thursday, 10 December 2015

Project 279: The craft room gets a makeover


One of the joys in my life is having a dedicated craft space in my tiny southwest London apartment. For years, I just kept my craft stuff in a closet and when it was time to craft, I would spend about 10-15 minutes getting everything out and then working from my kitchen table, repacking things up at the end. When we moved 2 years ago one of my mandates was a place for my stuff to live permanently so I could come and craft as I pleased. 

My space is, unfortunately, shared as the guest room in the smallest room of the house. So small that  we have to rearrange all of the furniture to get the pull out bed to fit in the room with my craft space. Which means if someone is only coming for a night or two we don't put them in here, we put them in the lounge with the pull-out couch! 

We have a friend visiting over the new year break for a few days with her husband and I decided it was time to make the situation inhabitable for them. Therefore, today's headline shot is of my desk a bit unusable as I move everything around! 

I've also discovered that a few of my storage solutions aren't really that great or fit for purpose as my kit has grown (the crafter's dilemma: how to keep storage scaling with your stash) so I want to investigate some new solutions. 

I'll still be crafting over the next few weeks but wanted to let you know that it may be a bit patchy. 

Also - I want to celebrate with everyone as I've posted over 100 times this year! My new year's resolution for 2015 was to hit 100 and I'm delighted to have made it. Thanks for sharing the journey with me. x


Monday, 24 August 2015

Project 246: Fun with the blending tools


Claire introduced me to a new technique using a blending tool and I am IN LOVE. It is a great technique to get colors and texture and all sorts of fun. So I decided to play with it using three strips I made with Claire and one I made after I raided Amazon and bought all the stuff for myself.

The headline is a card I made tonight using one of the scraps from my first blending attempt with Claire. She also gave me this stamp great stamp and I tried a new black embossing powder to make it stand out. The black speckled a bit so I decided to embrace it and I did a splatter using a iced spruce Distress Ink. I love it. I added two scraps, the green and the red to get a border across the middle and added green twine for an extra earthy texture. The pearls and candy make it a bit more polished. I really liked the roughness with all the technique. A win.


This card is amazing - if I do say so myself. I blended two colors and added two stamps from a free magazine set that I got. The black embossing powder comes out again for a silhouette that I love. I added a Martha Stewart punched border and some purple and blue pearls. The sentiment is for my sister's in-laws, they lost my BIL's grandfather this week and I thought this card would be a nice way to show I was thinking of them.


This card uses the same free card set as above, just a different dragonfly. The card came together organically - the blue paper was on the desk already, the tag was already embossed (for another project that didn't work out) and when I made a little mistake with a slip of the stamp, I took a spotted stamp from a Stampin' Up stamp set and I think it really made the whole card. It's all dotty and fun now. The stitched die is from Claire's collection and that she brought with her.


Finally this card is a great thing featuring new stamps Claire brought with her. This was my first blending tool attempt and I thought it worked well with this backing paper from Studio Callico. The greeting is great, isn't it? Such a simple layout but so sweet. The blending works so well to give it a bit of extra pizaaz.

Great technique and I can't wait to play with it more...now that I have all my own stuff!


Thursday, 20 August 2015

Project 244: Using scraps and kites


I had a great idea when I was cleaning up my desk. I had 2 strips of paper (one of which was reversable with a patterned and plain side) and they were exactly the right colors to match these kite embellishments that Claire had given to me earlier this summer.

These two cards took less than 10 minutes. Possibly 5. The pink card features two sides of one paper and all paper scraps were the widths and heights of what was on my table already. The blue card has scraps that I had to trim down slightly but still organically the right shapes to start with. The little tags are from Claire, a while back now, and worked so well with the cheerful kites.


I am going to be having so much fun with these kites, they make card making so easy and yet still look so fresh. 


Monday, 17 August 2015

Project 242: Double die-cut fun


Claire brought me some amazing dies from a sale in the US and this weekend I spent some time playing with them. I chose two complicated ones as features to see what we could do with them.

For this headline card, I wanted a fun, playful card to feature this robot. I chose three patterend backgrounds for my cards and then used the largest of an Xcut nesting stack of stars to cut big backgrounds out.


The robots were a bit fiddly but they worked well against the stars.I raised them with foam so they would stand out more. It took only a little effort (most of it getting the little robot bits out of the die cut) and I had 3 different varians.


Next I wanted to play with this intricate cake die. My cousin's wedding is coming up so I thought it was a good way to put it to the test. I decided to go for a neutral beige theme throughout as an elegant scheme. The Mr and Mrs die cut is from Claire in a pack she sent me a while back. The background paper is from the stash but I couldn't say from whom as it's just been kicking around my drawer loose (the shame of a messy desk). Finally I added a bit of pearl bling to give it a touch of class. Really simple but pretty I think.

These were all really simple to make but because of the intricacies of the dies they really look modern and as if they took ages. That's a win in my book.

Friday, 7 August 2015

Project 239: A bespoke bridal tote


A few weeks ago my friend Palo got married and I was so happy to be a bridesmaid and be a part of the process. She had asked us to have a bag of some sort to carry emergency supplies in and we came up with this idea of making a tote bag in their wedding color to use for the occasion.

I had a royal blue bag printed with their name and wedding date on it - only to realise when I received it that I had ordered the wrong date! OOPS. So I got crafty and decided to patch over it.

First, I cut a strip of pink and blue fabric from my stash as the main patch over the date. I have a very limited fabric supply so I was so pleased that this not only worked but was a scrap from a bigger piece the bride had given me for a previous project. I folded the edges and ironed them to get a crease using the hotel iron and hand stitched it over the date.

Did I mention that I ran out of time and had to do this while at the hotel before the wedding?? I hadn't known what I would need to do the fix so I brought a bag of flowers, ribbons, fabric, thread and needles and just made it up as I went.

I stitched on a flower to make it a bit more interesting and then added a rosette flower with ribbons on the back to make that side have a focal point as well.

All in I was really pleased! I thought the bag came out well and the bride loved it. She doesn't know that it was really fixing an OOPS moment so unless she reads this....she never has to know :-P

Saturday, 18 July 2015

Project 236: Some new kit and new techniques with an old friend


If you didn't see my earlier posts, CLAIRE IS HERE!

We had a great playdate one night and goofed around with some new kit she brought with her. Some of it were purchases I made from her as a Stampin' Up demonstrater but some of it was from her stash.

The first is a card we made using a flower stamp and die set I bought. I stamped over spotted paper and die cut it and a stem from a scrap on my desk. The ink wasn't different enough so I dotted over the lines of the image with a pen. I used a greeting from Claire's stash and was going to keep it very CAS. But my hand smudged green ink and I got it in the white space down the left side. So with some advise from Claire I added some fingerprints in a gradient of green to blue to purple down the side. Crisis averted, cool texture added, very pleased!


This card here is a super simple card using this new kite embellishment Claire and her mom gave me. I used Claire's stitched die for the baking paper and the Explore Nature greeting from my flower set used above. Just a candi and I called it quits. CAS is best with something like this.


Claire introduced me to freezer-paper masking, which is new to me. She had diecut sentiments and shapes for me and this one is adhered to a stitched rectangle. I colored it using Gelatos and a watercolor brush and added some speckles for texture. I choose blues as I'm using this for a wedding card and they have a royal blue scheme. I added pearls of different sizes and colors and again left it pretty simple. I think the masking works amazingly well and gives such an artistic touch to a simple layout.

Delighted with these projects and the chance to play face to face.

Saturday, 11 July 2015

Project 233: Embossed sheet wallets


CLAIRE IS IN LONDON!

Yays all around.

We are going to try to fit in a few craft sessions while she's here but I wanted to have a few little things to give her when she arrives. A while ago I saw a post about a crafter who created a little embossing folder wallet thing for another craft friend and I thought it would be perfect - except I can't find where I saw it! Pinterest? A blog? YouTube? No idea.

So I decided to make up my own!


I chose some really busy papers that are pretty but hard to use in card making as a base. I chose an alternative paper for the lining and added a little fold-down bit to give it some style and also make it easier to pull sheets in and out.

I embossed 5 sheets in card stock that matched the folders: houndstooth in purples and pinks for the butterfly wallet and basket weave in tropical colors for the floral wallet.

It's a simple gift and one that shows I'm just so anxious for our playdate.

SEE YOU SOON BUDDY!

Tuesday, 2 June 2015

Project 225: A special mother's day card


I have been meaning to post this for ages - I had to wait until the recipient had the card before posting and then it just slipped my mind altogether. But I'm super proud of this project so there's no time like the present to share it!

I wanted to make a special card for my mom this year and browsed Pinterest for some inspiration. I loved a few iterations that I saw of a flower pot card (this one was particularly cute), where you pull out the flowers to reveal a message.

I did a step-by-step tutorial here and found it really helpful in making the pot pocket. I decided to go for tulips for the flowers, and made them out of pink scraps and a petal die I had on my desk. I then added some green petals for flowers. I was really pleased to use a lot of scraps that I had at my disposal - even the little pink insert on the message is a scrap!


The rest is pretty straight forward really. I punched a scallop edge to the pot and added a little daisy-chain border to the bottom. The ribbon is from Tiger, really cheap and really good quality. 

I didn't take a picture but on the back I simply wrote 'Pull me out' in case it wasn't clear that it was something that could be separated. She really liked it and it's definitely a layout I can now make again. 


Thursday, 29 January 2015

Project: Sketch time at MAWTT


This week at Moving Along with the Times we are hosted by Claire and she's got a sketch for us to play along with:


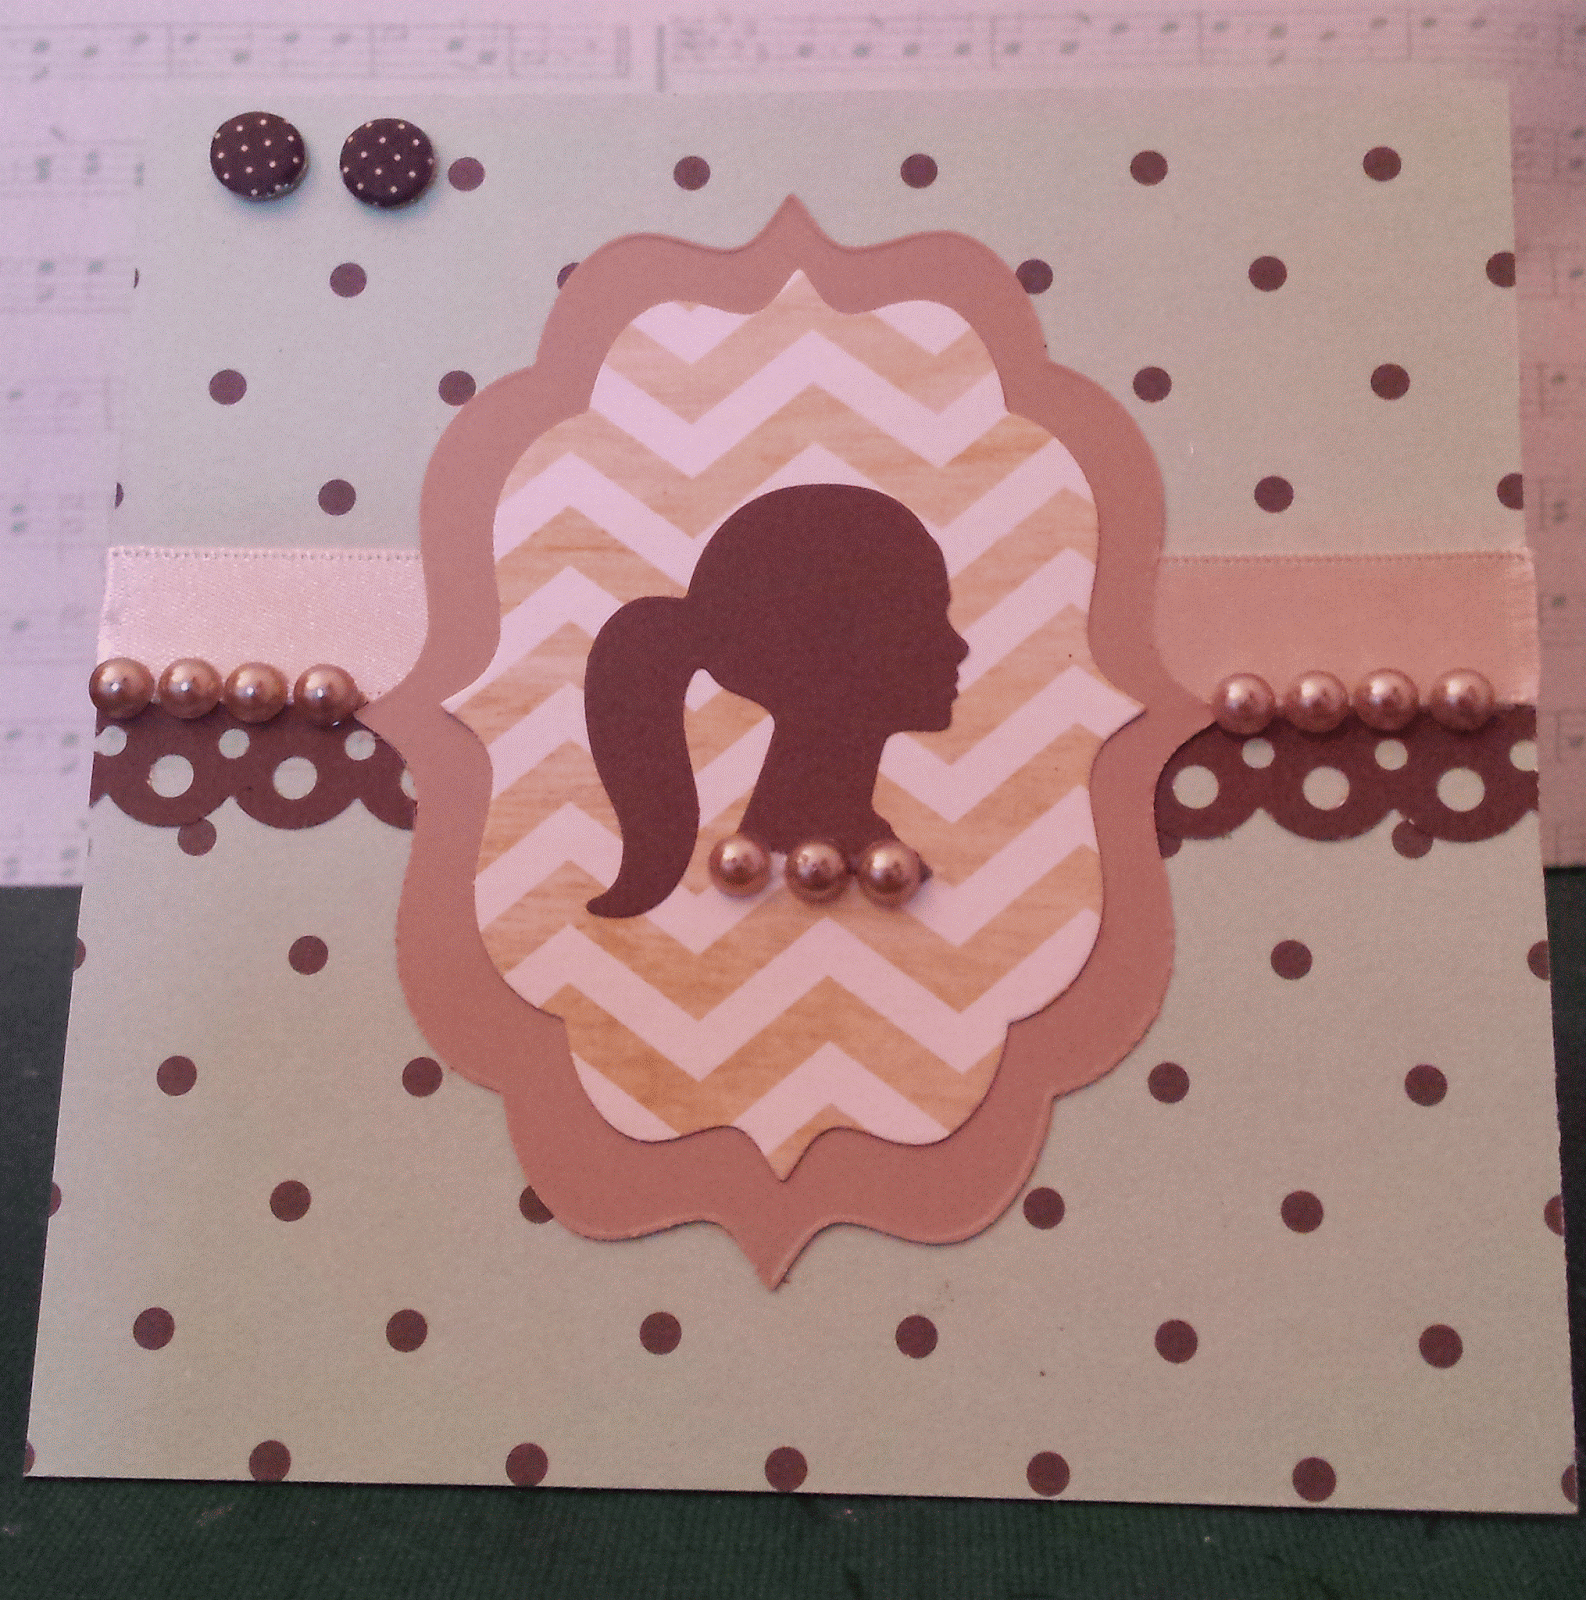
The headline is my take on the layout. I recently rediscovered these cameo dies and thought it would be fun to play with them on this challenge using modern colors and patterns.

I used a decorative nesting label die for the central feature and did two layers in beige and chevron. The cameo is cut out of a dark brown paper that I also used for the border punch, a Martha Stewart one that is a favorite of mine. The green spotted paper and chevron paper are both from the Neopolitan Recollections pack from Michael's.

The beige ribbon is actually covering an oops moment - I smeared some ink from a completely different card on the green paper and thought I'd see if I could hide it rather than start over - successful I think!

The little beige pearls were added for texture as were the little brown spotted candies. I really enjoyed digging out these dies - sometimes a layout challenge causes you to rethink your kit and I hope you find it does the same for you this week!

Wednesday, 19 March 2014

Project 140: WOYWW and shower materials


Hello and happy Wednesday!

The headline shot here is of my desk for What's on Your Workdesk Wednesday - a challenge run by Julia on her Stamping Ground blog.

What you can see is all the makings of my sister's bridal shower materials - which is SATURDAY. GAH!

In the folder are pink menus, game response cards (like how well do you know the bride answer sheets) and some other bits and bobs. Around the folder are some border and corner punches as well as a heart punch, two boxes of bling and some ribbon - trying to work out how I'm going to jazz these up.

The yellow tin is my little tool box of necessities (corner rounder punch, craft knife, that kind of thing) and next to it are some stamps that I went through to see if I have anything that will work for the shower. Short answer is not really so I'm going to stick to punches and bling!

And then everything else are fixed features: my caddy of bling, ProMarkers, pencil/scissor/glue box and ATG.

Finally - last time I played WOYWW I revealed that I had my first celebrity endorsement as a friend was going to a baby shower for someone on Strictly Come Dancing, the UK's Dancing with the Stars. I can now reveal that the card was for the beautiful Erin Boag!

Plenty of the other dancers were there and I was thrilled that my card stood out from the pack. I loved it so much, here it is again:


Thanks for stopping by, I can't wait to see what you all have going on! x

Tuesday, 11 December 2012

Project 56: Christmas jam and candles


What a weekend of crafting has passed!

Firstly: spiced fig and plum jam. I love making jam and last year I trialled this one as a Christmas gift for a few family members. It proved a success so I’ve made it again. Largely for the same people. If you are reading this and you are on the Tracy side of the family: apologies. If you don’t want this please let me know and I will find it a good home!


My mother in law gave me this beautiful jam pan for my birthday one year and it has really been a fine friend.  

This year I did a little trick with my craft kit, using a punch to cut my wax discs to size. Clever me! 


And finally, after what felt like 3 days of watching it boil, all potted up. Even though the recipe is from GH, my companion in preserves is neatly on the side there, a handbook on preserving published through River Cottage.  If you’re even curious about preserving this is a great investment.

Next up: candle making.

I have a problem when it comes to hoarding. I’m not a tragic case yet but we have amassed a large collection of useless little things. One collection is little glass ramekins that come free with our favourite pre-made refrigerated desserts. Mmmm Gu puddings…

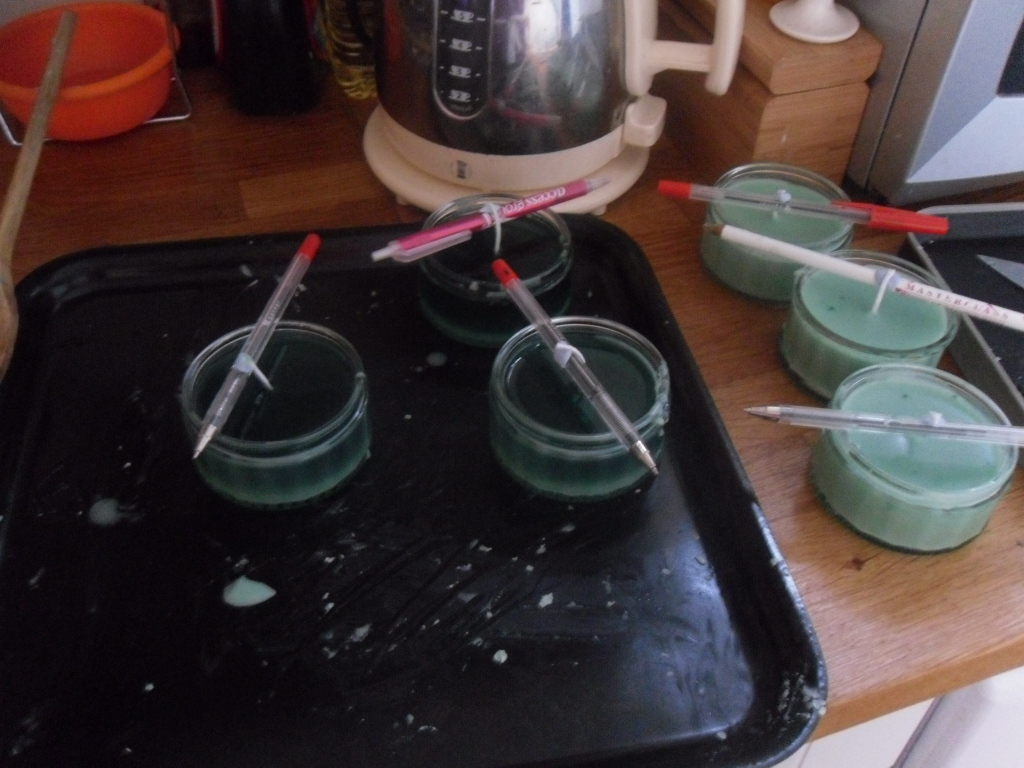
So with this collection I did some research and realised it would be very easy to turn them into candles. Quick bit of online purchasing and I had myself a beginners’ kit to make some container candles.


This process was a bit more involved but not overly labour intensive. You have to get the wick perfectly straight so you blue-tack it to a pencil lying across the top. (This is the tip in the instructions, not a fun fact from me. I used my clever innovative idea on the punch-cut-discs above.) 


Then you melt the wax in a double-boiler, adding dye and fragrance along the way. Pour it in and wait for it to set.

To dress them up as gifts (going into a gift set with the jam and these wreaths) I added some festive Christmas ribbon.


Wrapping things up: a bit of festive décor for the office. I decorated stockings for everyone in our office, bought some lights and little decorations and then wrangled the studio design team into carrying a tree home from town for me. Pure delight that I got all of this up with all the bah-humbugging in the office.

American friends – a note on spelling. I’m using my work computer and the spell-check is aggressive. I still think in American though.

Tuesday, 13 November 2012

Project 53: Card sets


Another playdate with Claire, another armful of bounty to share with the world.

I’m flying out to see my parents and sister in New Orleans for Thanksgiving and we will be seeing some family friends that I haven’t seen for years. My mom encouraged me (coerced feels more appropriate though) to bring some sets of cards for the family friends. So I roped Claire into the fray and we made loads of sets of cards to give away.

I’ll start with my favourite of the session: these embossed, inked and tied heart DL cards on the headline. I did them in reverse of each other, making a little set of four. This card was a major faff, all the techniques going into the stamping and inking and what not. I’m pleased it’s going to a good home.


The next one is one that Claire did – the zebra and yellow combo is super sweet. I said at the time I never think of yellow and black but it’s a stellar combination.


Then we both did a similar card using tags in pink and green. As CG mentions on her blog, we followed completely different inspirations from Pinterest and yet we ended up making very similar things. How funny. I think one of these sets should go to my sister as she’s all about pink and green. (mine are the top, CG's are the bottom, for reference) 


Next we have the quilted pattern I made using Claire’s scallop square punch. These papers really spoke to me and they’re blue and brown which is a combo I can’t get enough of. My mom will probably like these…

Then we have Claire’s black and pink winner. We played a lot with that raffia-style thread. It’s super thin and easy to work with.

Then we made some engagement cards but I won’t post those as I’m going to be hand delivering them this weekend! The best thing about playdate sessions is that you see someone using the kit you have in a different way, or trying a technique with a common tool that you'd never considered. It's much better to craft with a friend than to craft in isolation. 

All in all a super productive Sunday session. I had to dash off for a work dinner but otherwise I think we could have stayed all night making these. Well until Claire’s husband kicked me out for talking nonsense and being a liability for drinking/crafting at the same time. It’s happened….a few times. 

Monday, 10 September 2012

Project 44: Card stock canvas decoration


I saw this canvas project on Pinterest a while back and have been looking for the time to dedicate to it. I have a few days off and thought this would be a good time to give it a try. 


First I went out and got a canvas. Wilkinsons sells printed canvases cheaper than you can buy a blank one in an art store so I bought one with a photo on it for £5 and painted over it. 

After getting the color I wanted (about 5 layers of mixed paint which, of course, were a slightly different shade each time because I never remembered the proportion of white to blue to green to black) I let that dry for about 3 hours. (I used a plastic bag over a gym mat as my crafting area after getting paint on the bathtub last time I tried to "safely" paint in the bathroom.) The paint looked streaky when I stopped but it dried really evenly.

I had cut out the petals the day before; be warned that this is tedious. About two thirds of it is the Latte Matstock by DCWV and the rest is comprised of scraps.  I did a loose arrangement to make sure it would all fit. 


Then I got to bust out my handy dandy glue gun. This wasn’t as time-consuming as I thought it would be. 

And there we have it (see headline photo). I’m going to hang this on the wall in the bedroom (even though it matches nothing) to jazz that room up a bit. 

PS I have some new Christmas designs as well so I just need to get another post up this week. Stay tuned!